
Full NetSuite Configuration
PREREQUIS
-
Enable appropriate business features in your Netsuite environment.
-
Create an integration role and assign this role to employee registration (employee record) that will be connected to NetSuite
-
Create a record integration record to generate your Client ID and Client Secret with the appropriate information mentioned in the record
Please refer to the annex for more details on the connection configuration.
CONNECTION
Step 1: Connection name (free choice)

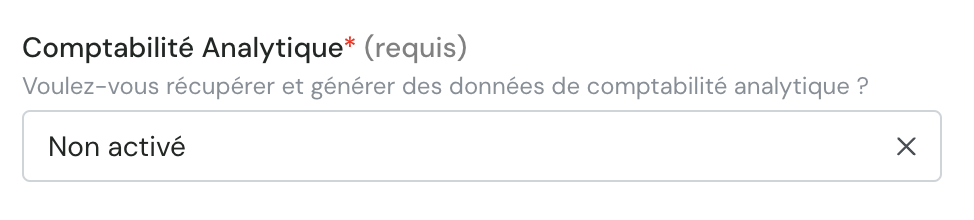
Step 2: If the analytical accounting field was mentioned (Preparation stage 2), then analytical accounting = "active", if not accounting analytical = "inactive".
Step 3: Your Netsuite account (https://docs.oracle.com/en/cloud/saas/netsuite/ns-online-help/section 1498754928.html)

Step 4: Fill in the client key (client id)
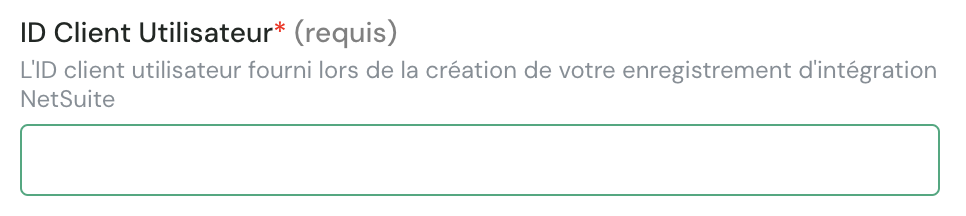
Step 5: Fill the secret key (secret client)

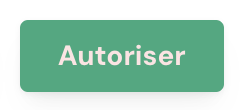
Step 6: Click "Authorize". When requested, please enter your credentials (associated with the application) to connect your Netsuite account.
The President
Company-related functions
Under Configuration > Company > Enable Functions, you must activate:
-
Under SuiteCloud
-
SuiteTalk (Web Services)
-
REST Web Services
-
-
Manage authentication
-
Authentication by token
-
OAuth 2.0
-
NetSuite as an OIDC Provider
-
-
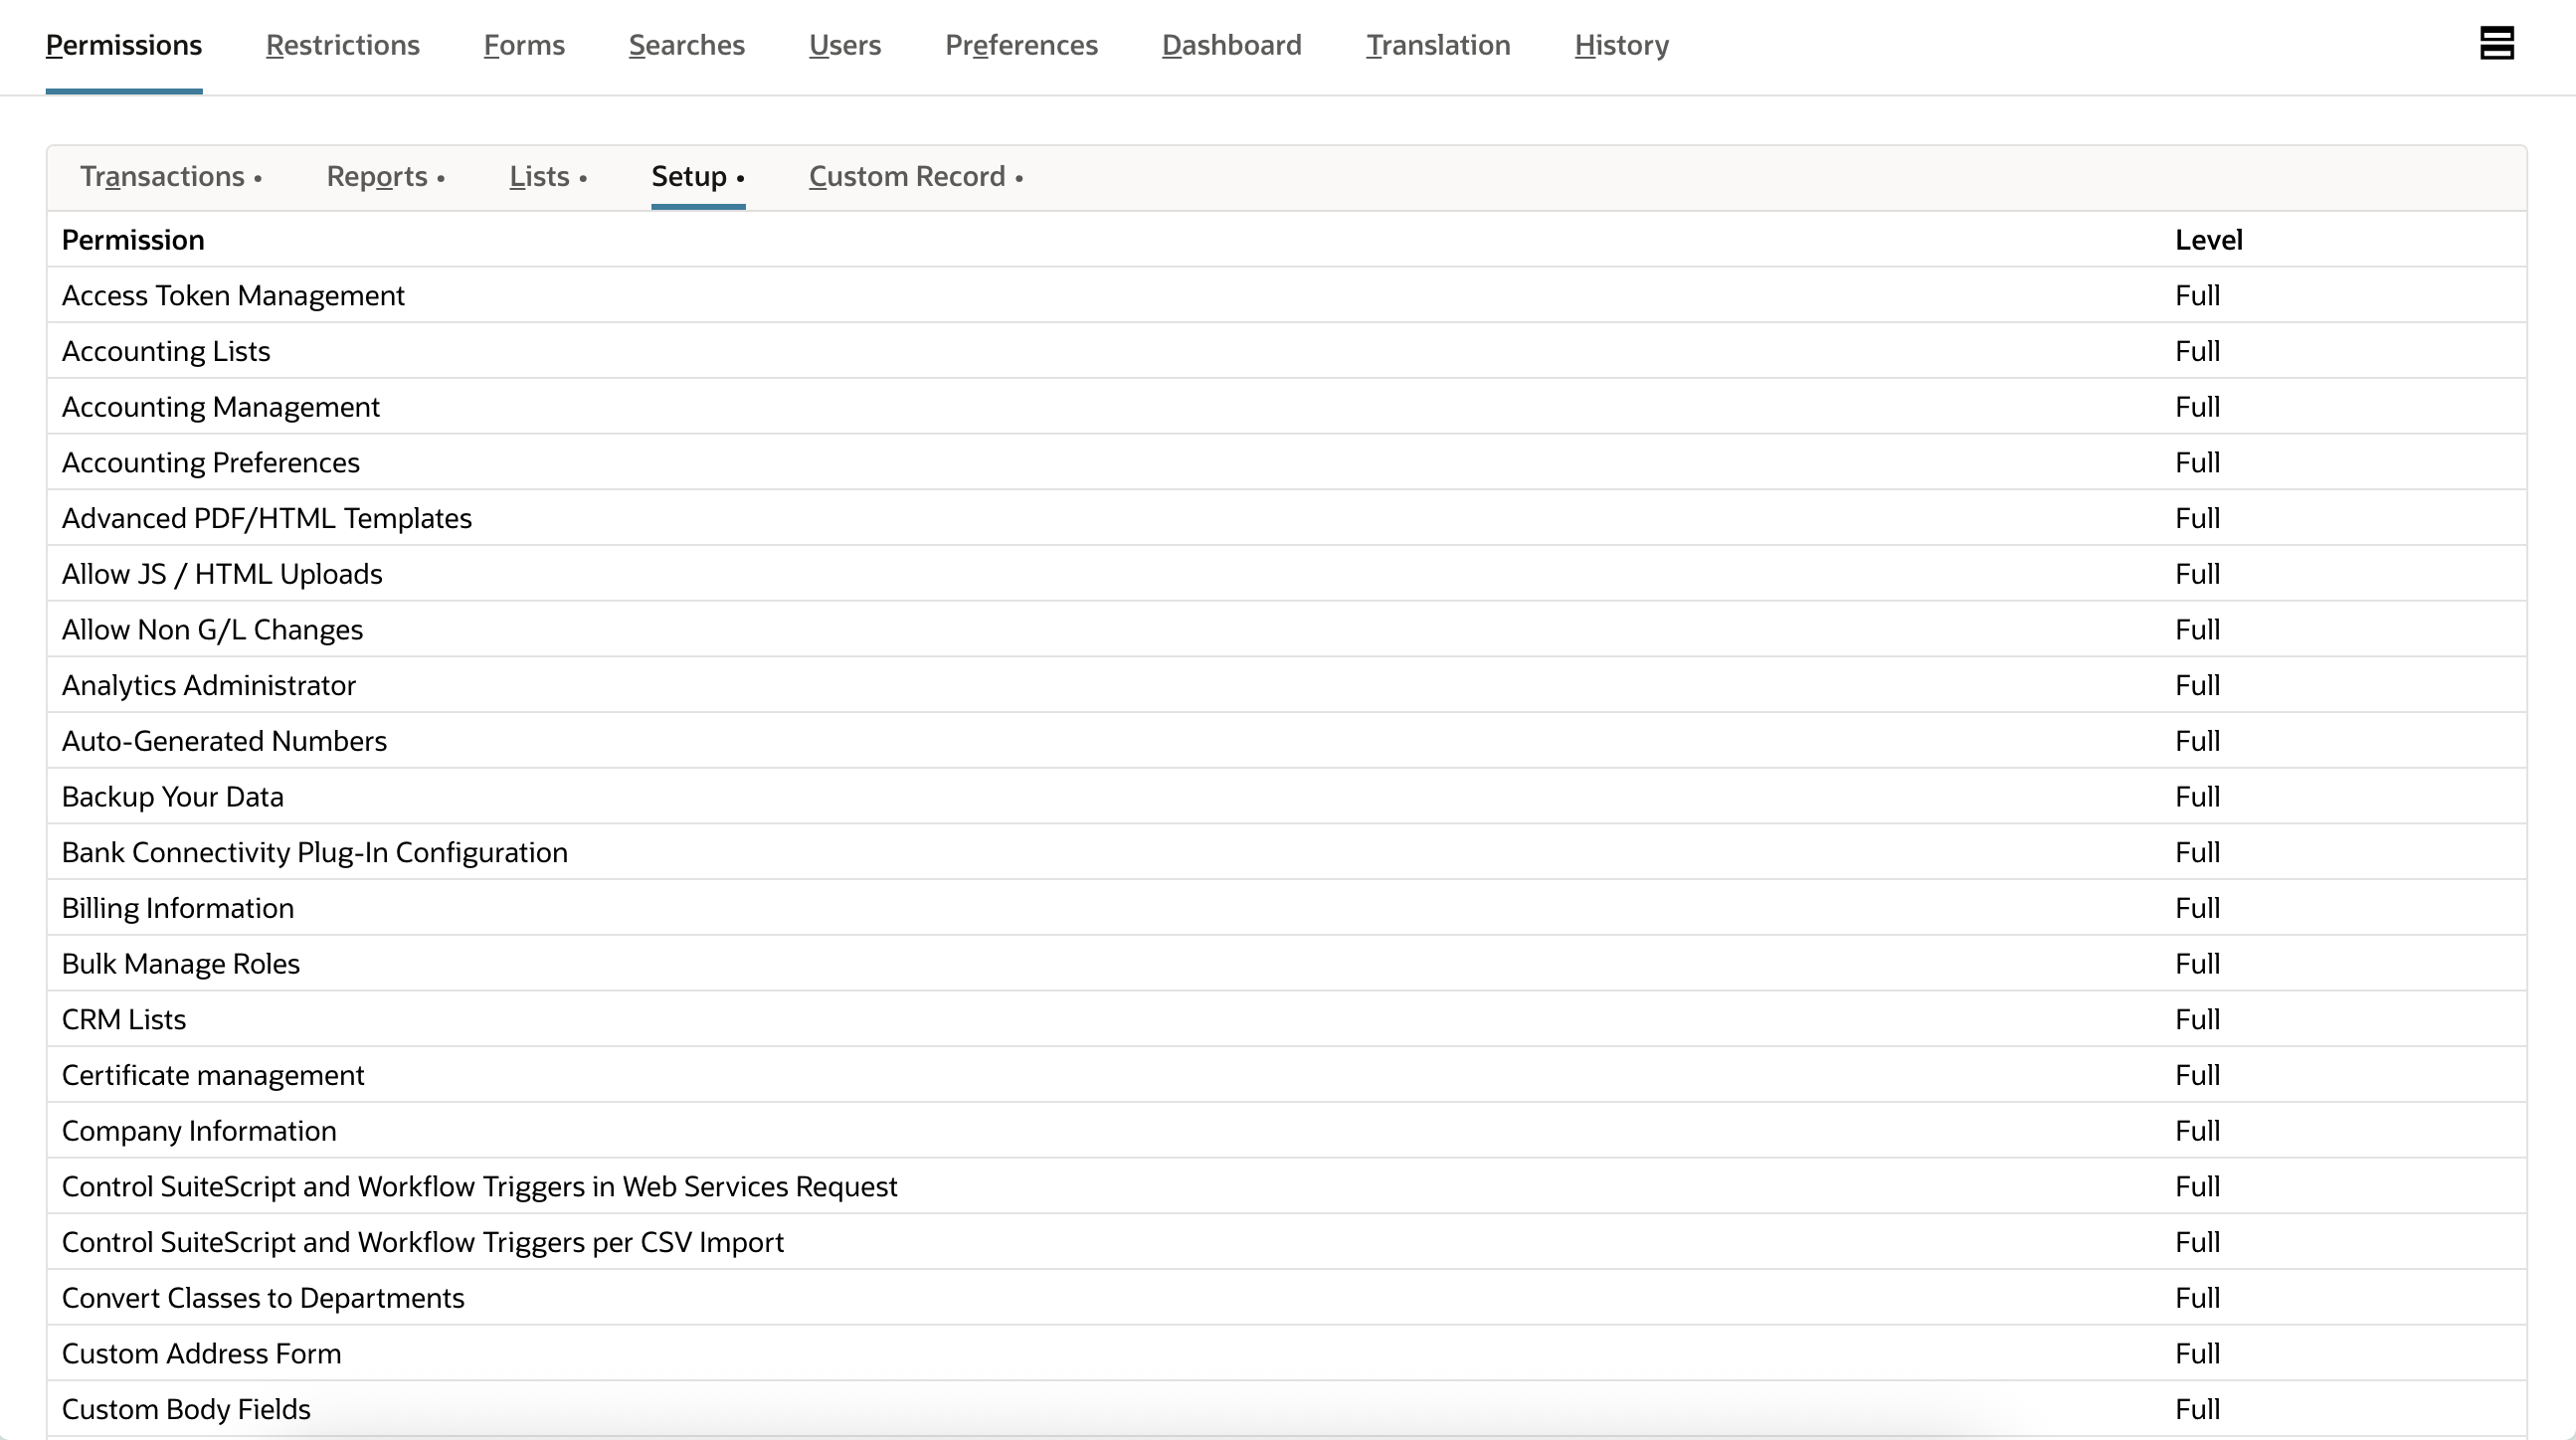
Permission of the "custom" role
Under Configuration > Users/Roles > Managing Roles > Creating Role
Please select the following permissions.
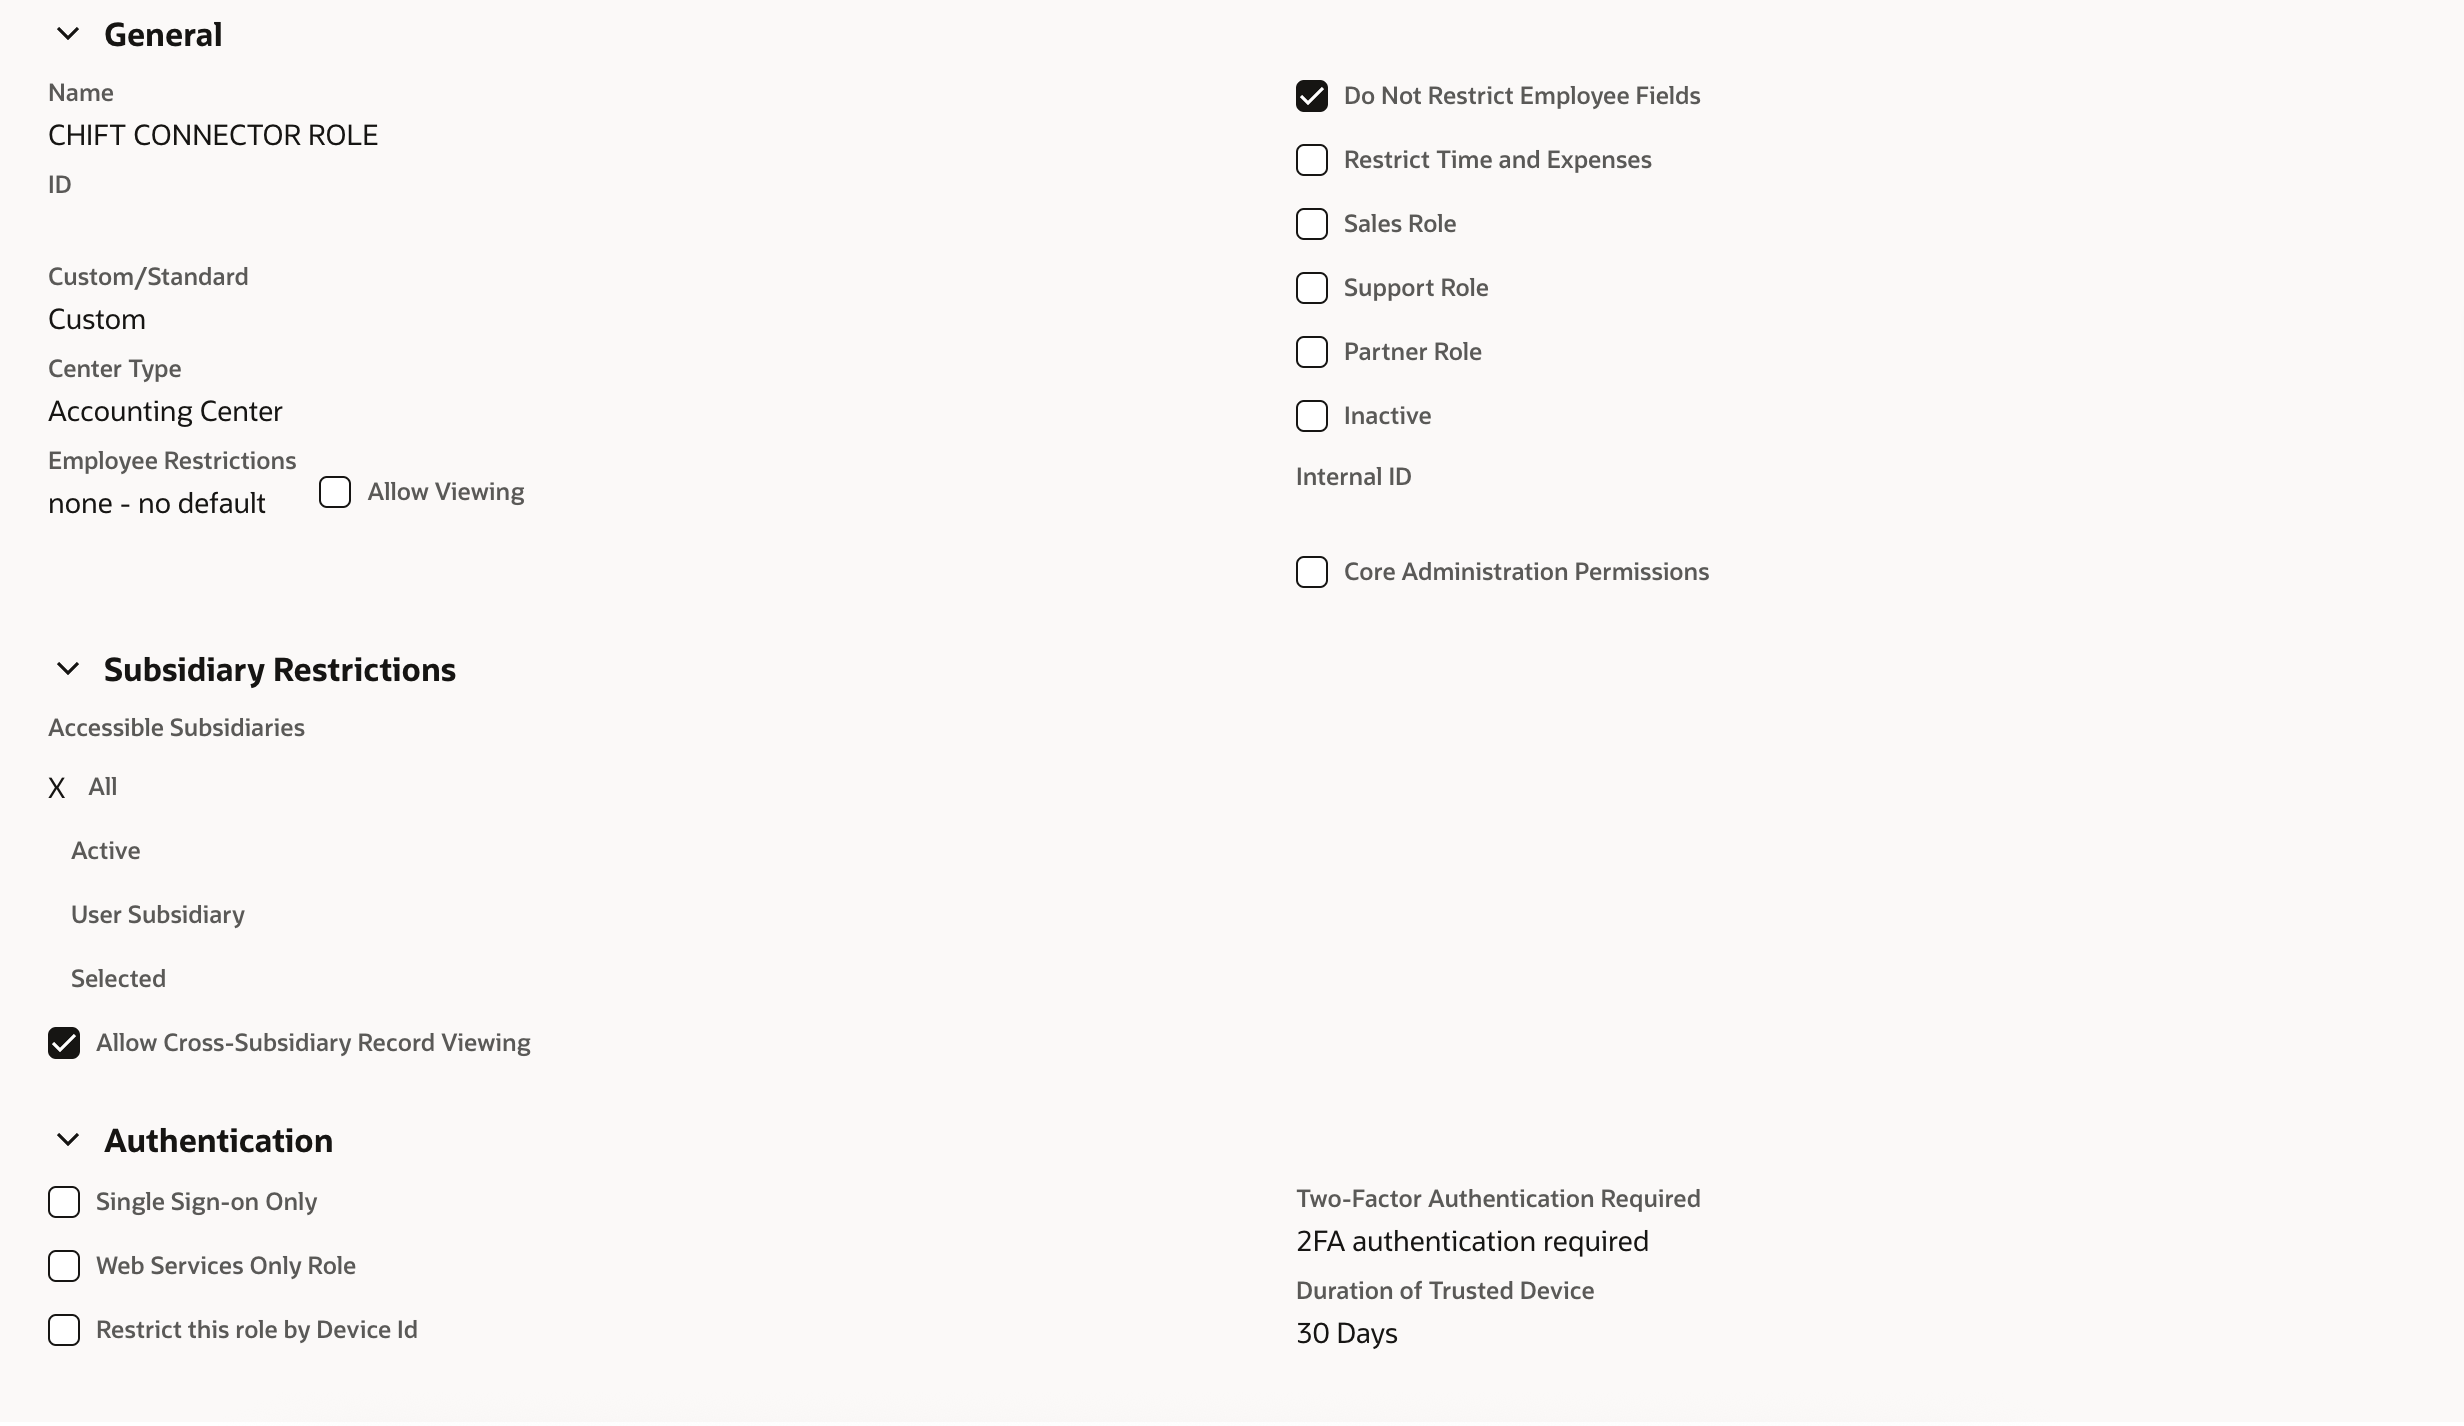
Under:
-
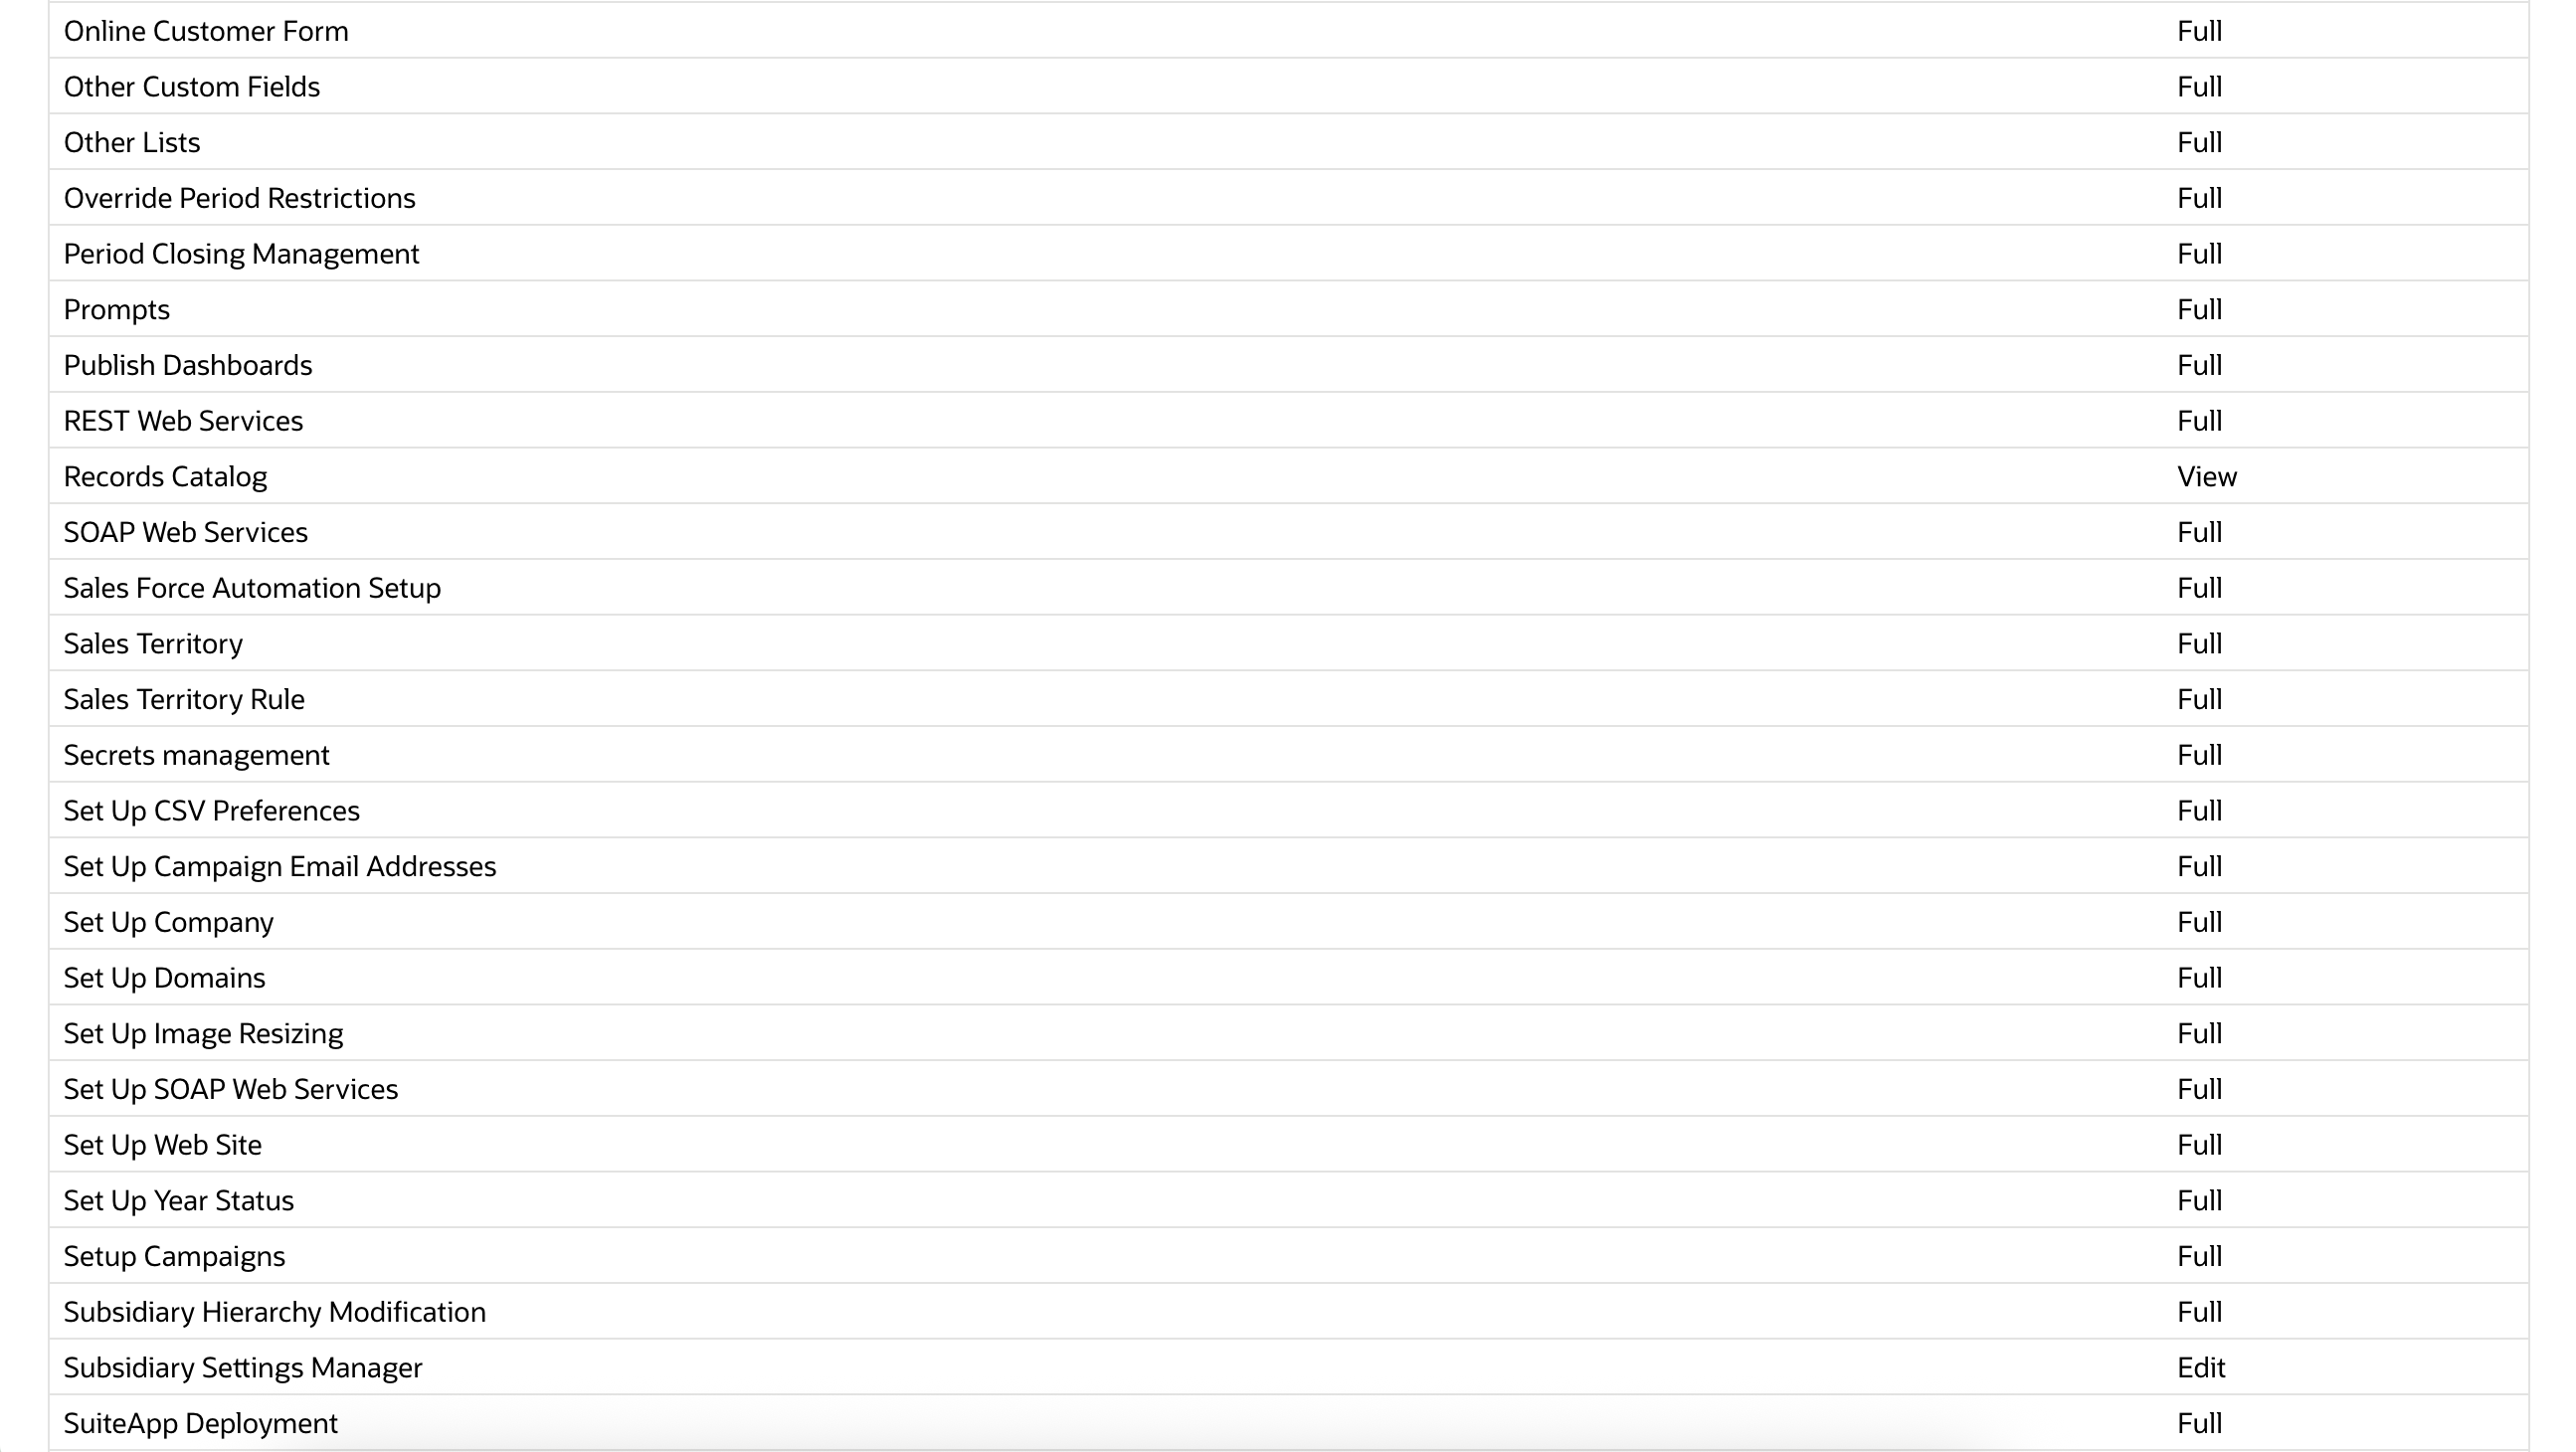
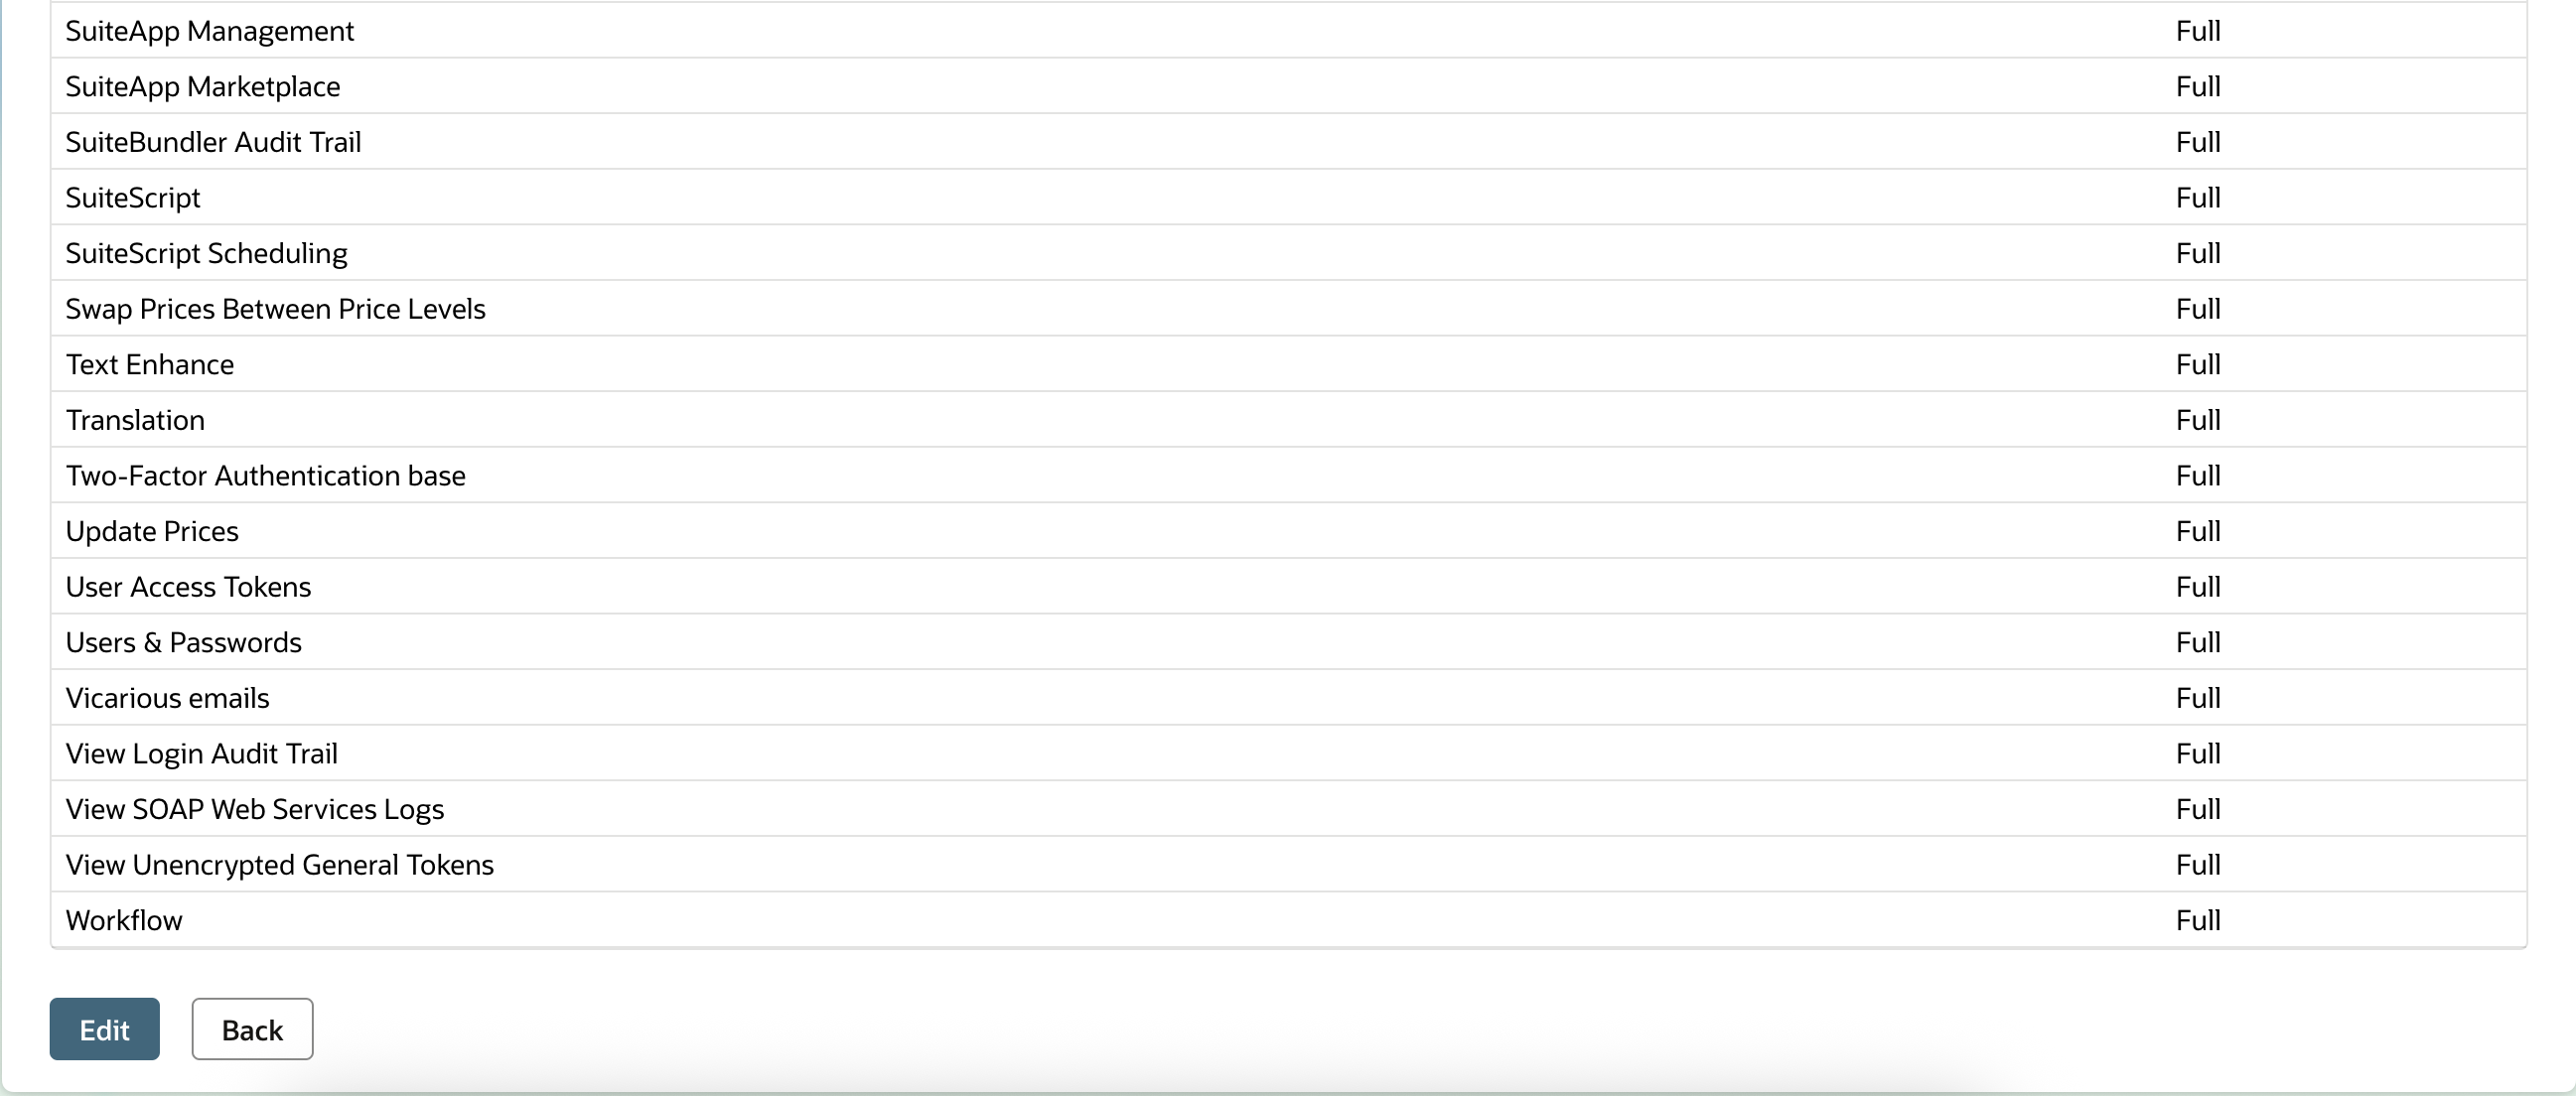
Authorizations > Transactions
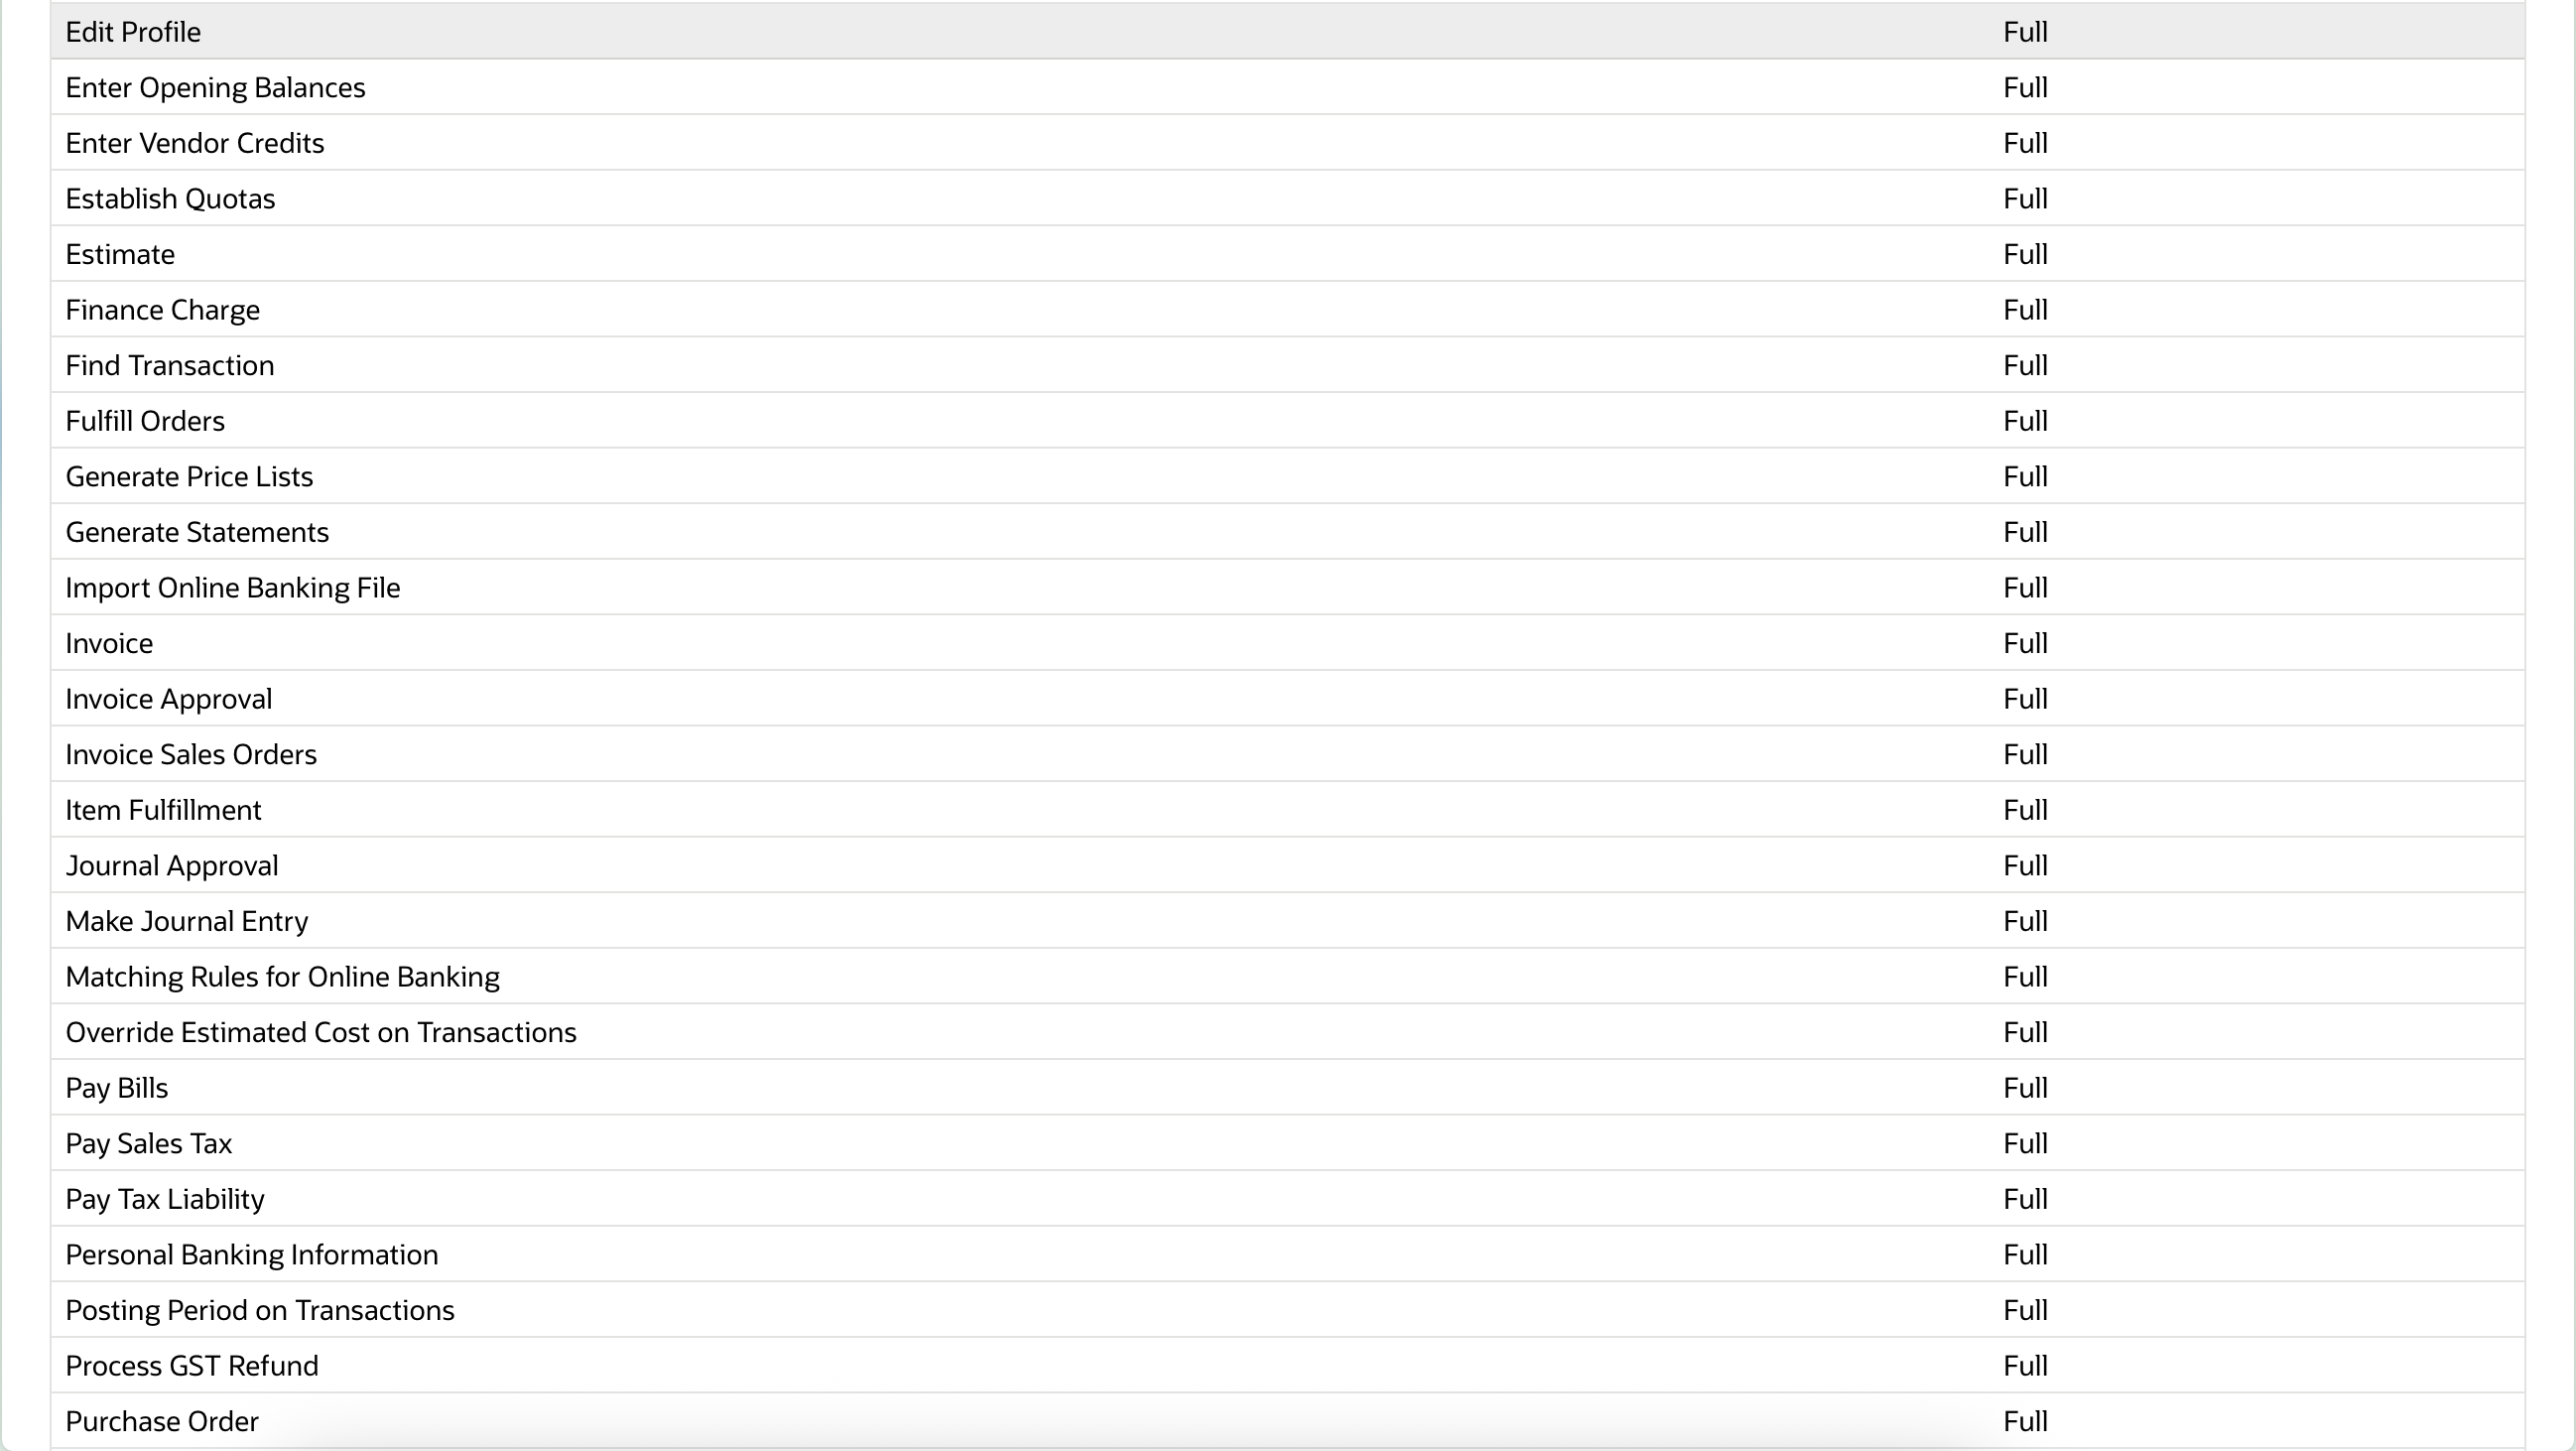
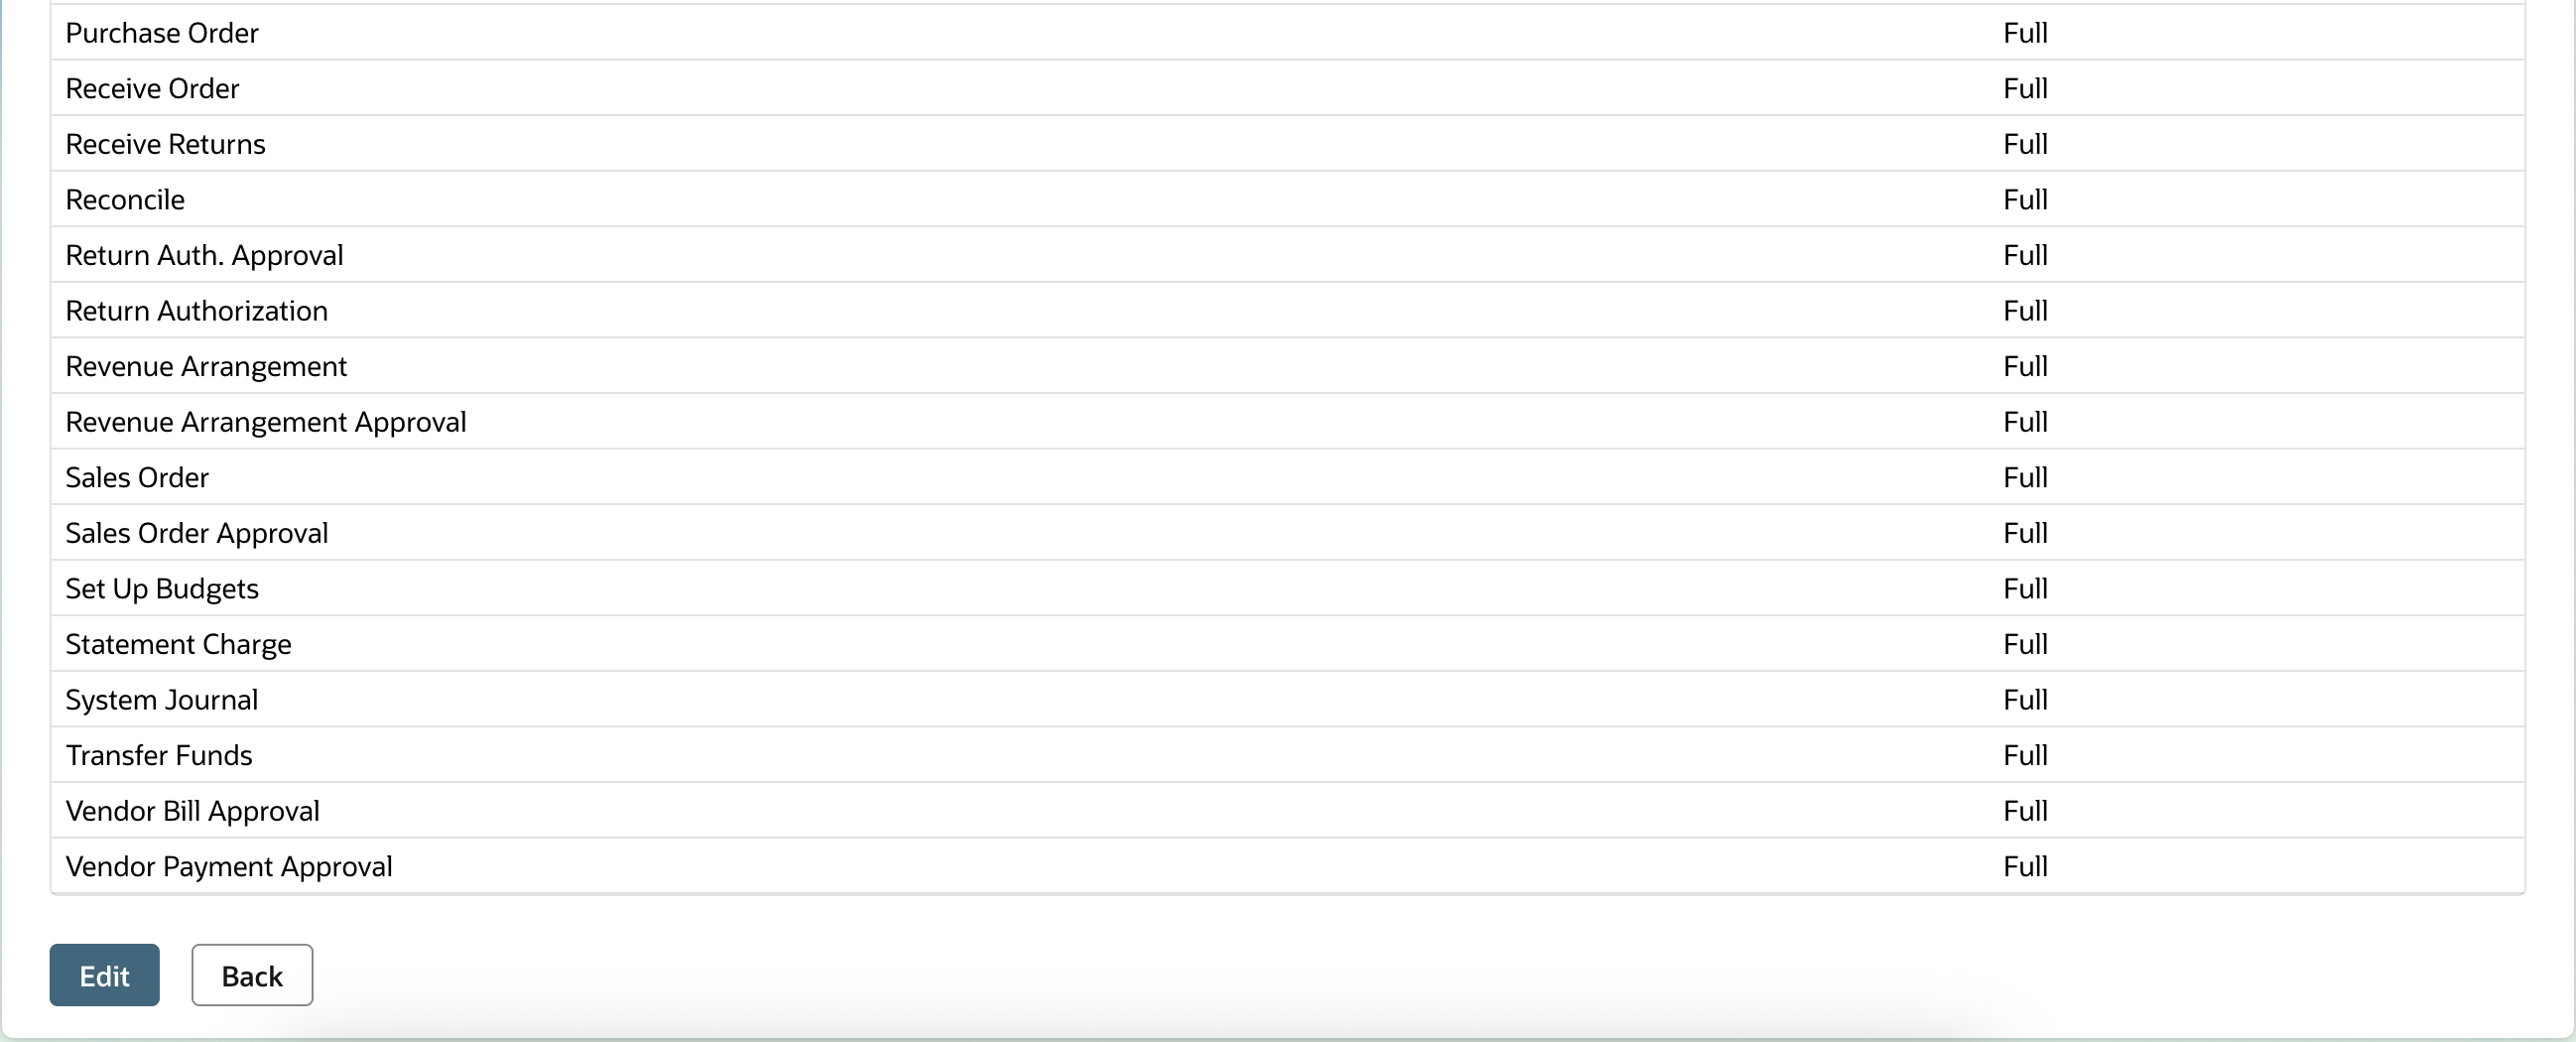
-
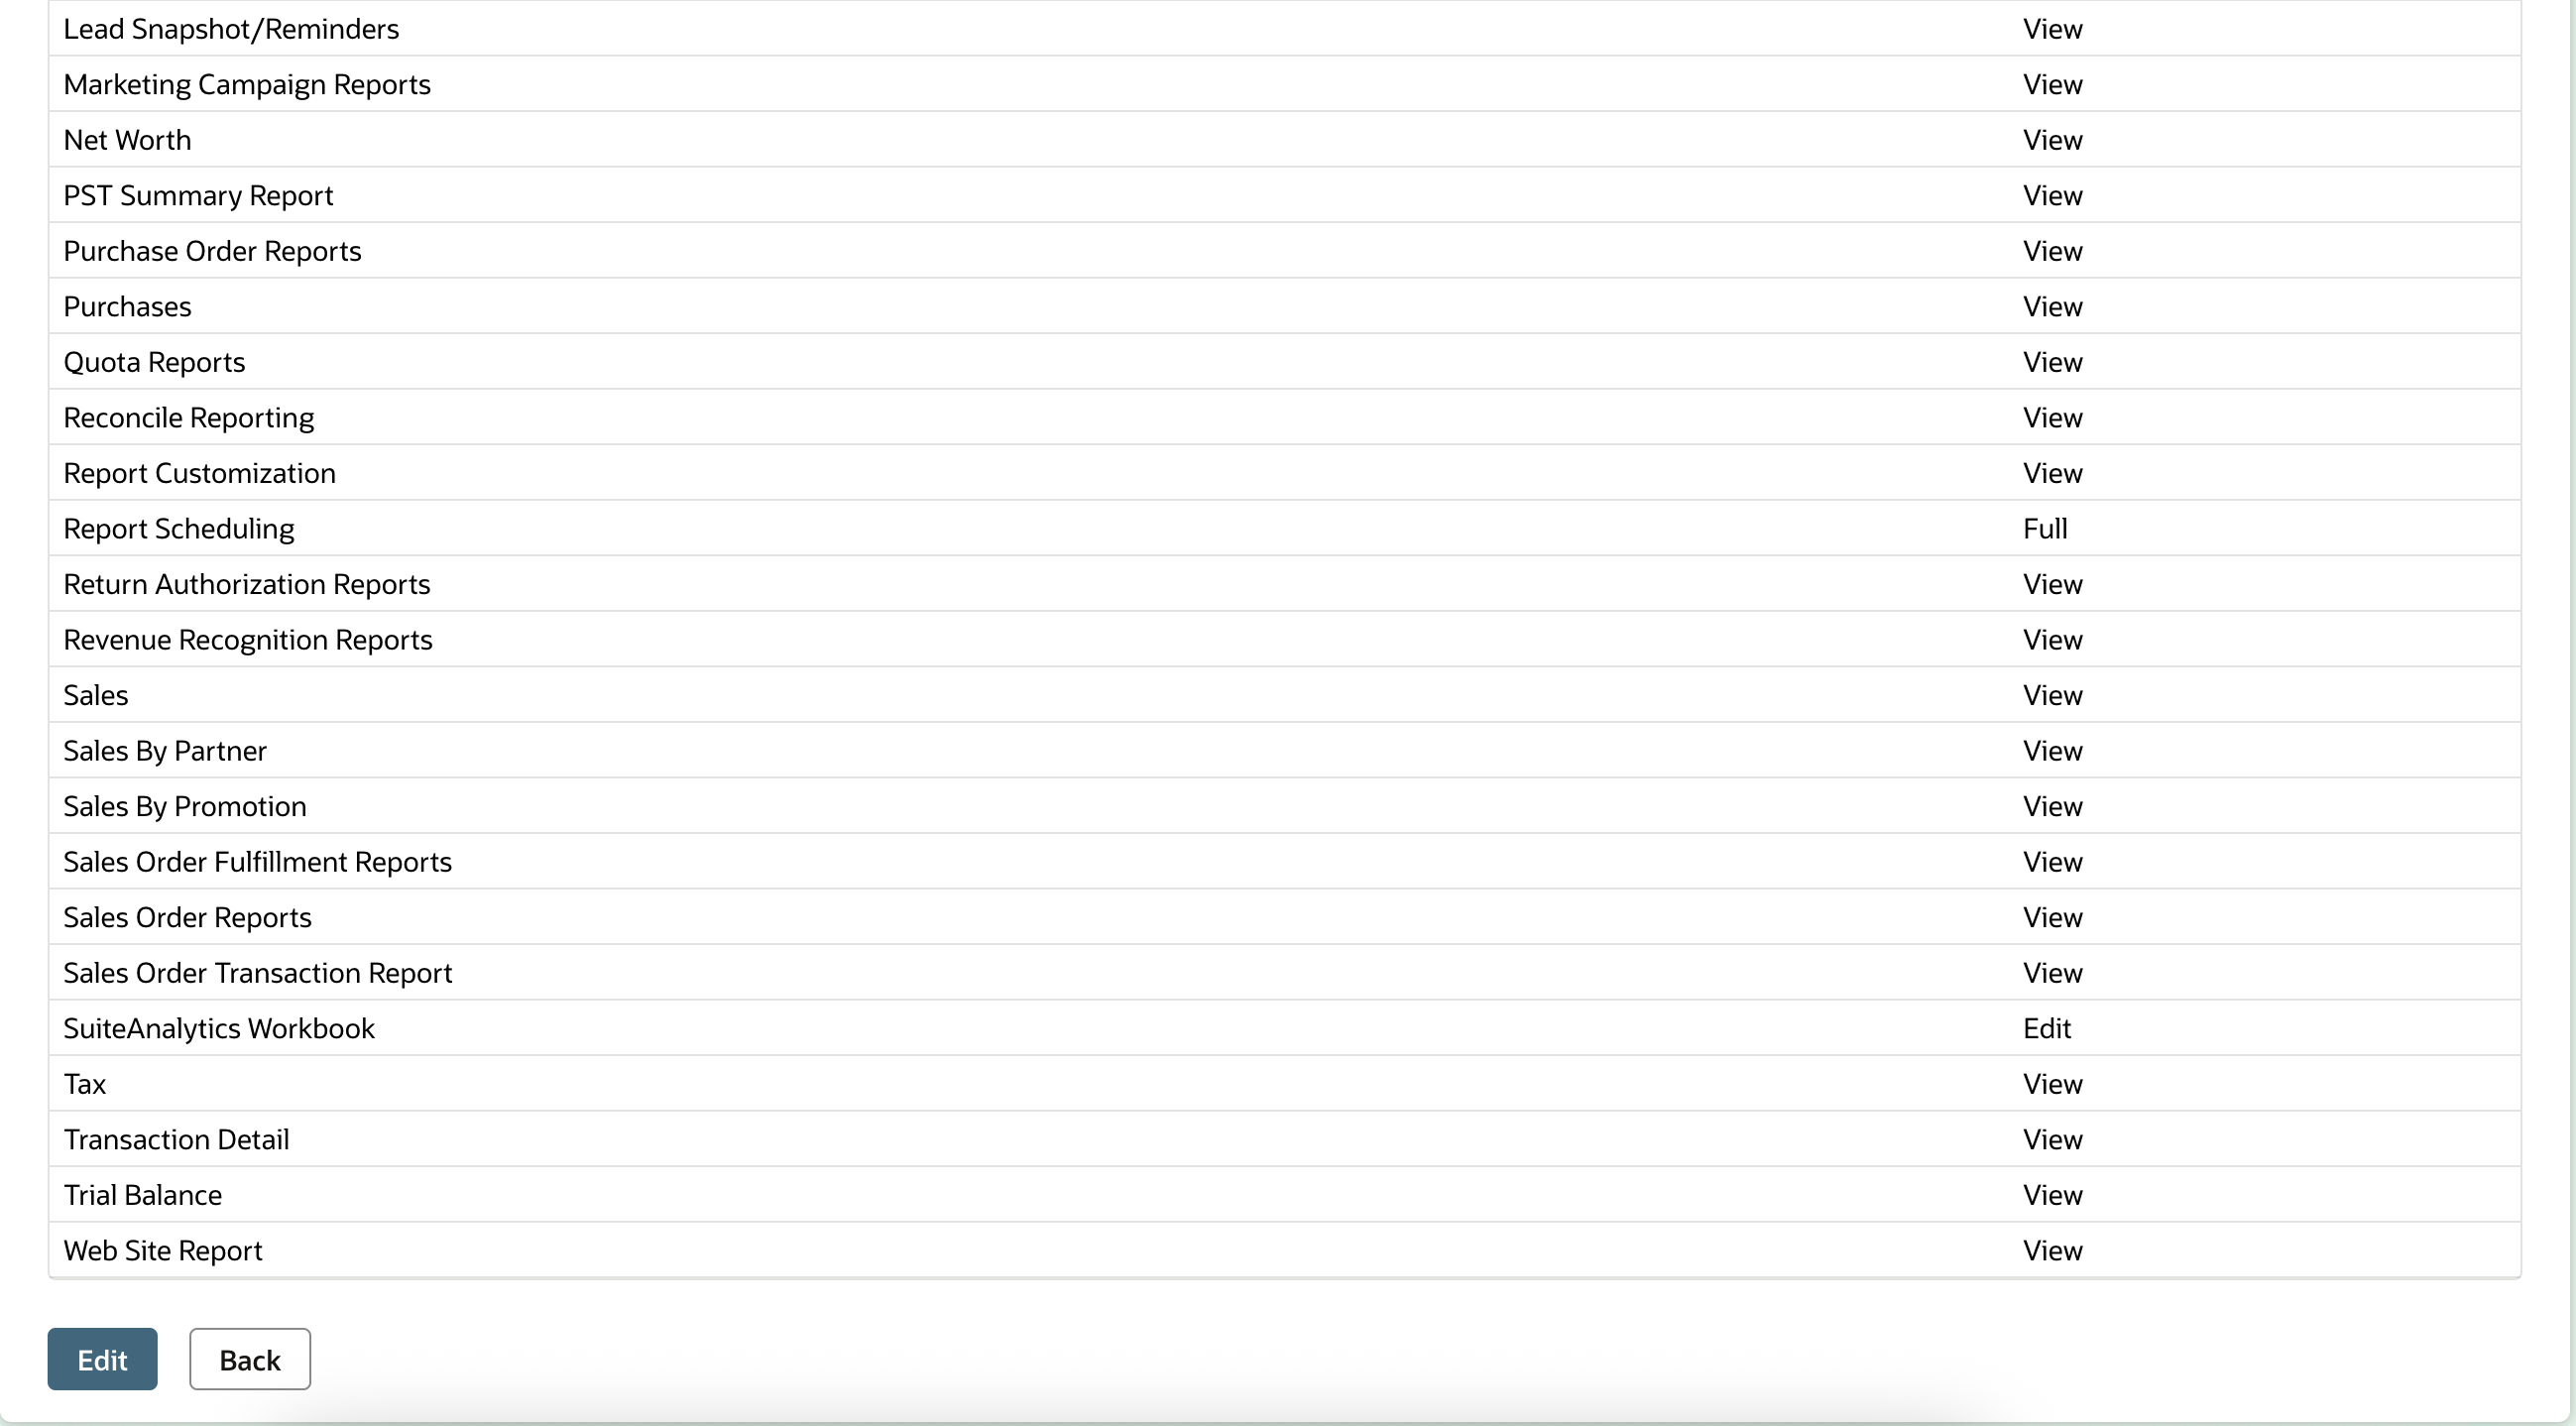
Authorities > Reports
-
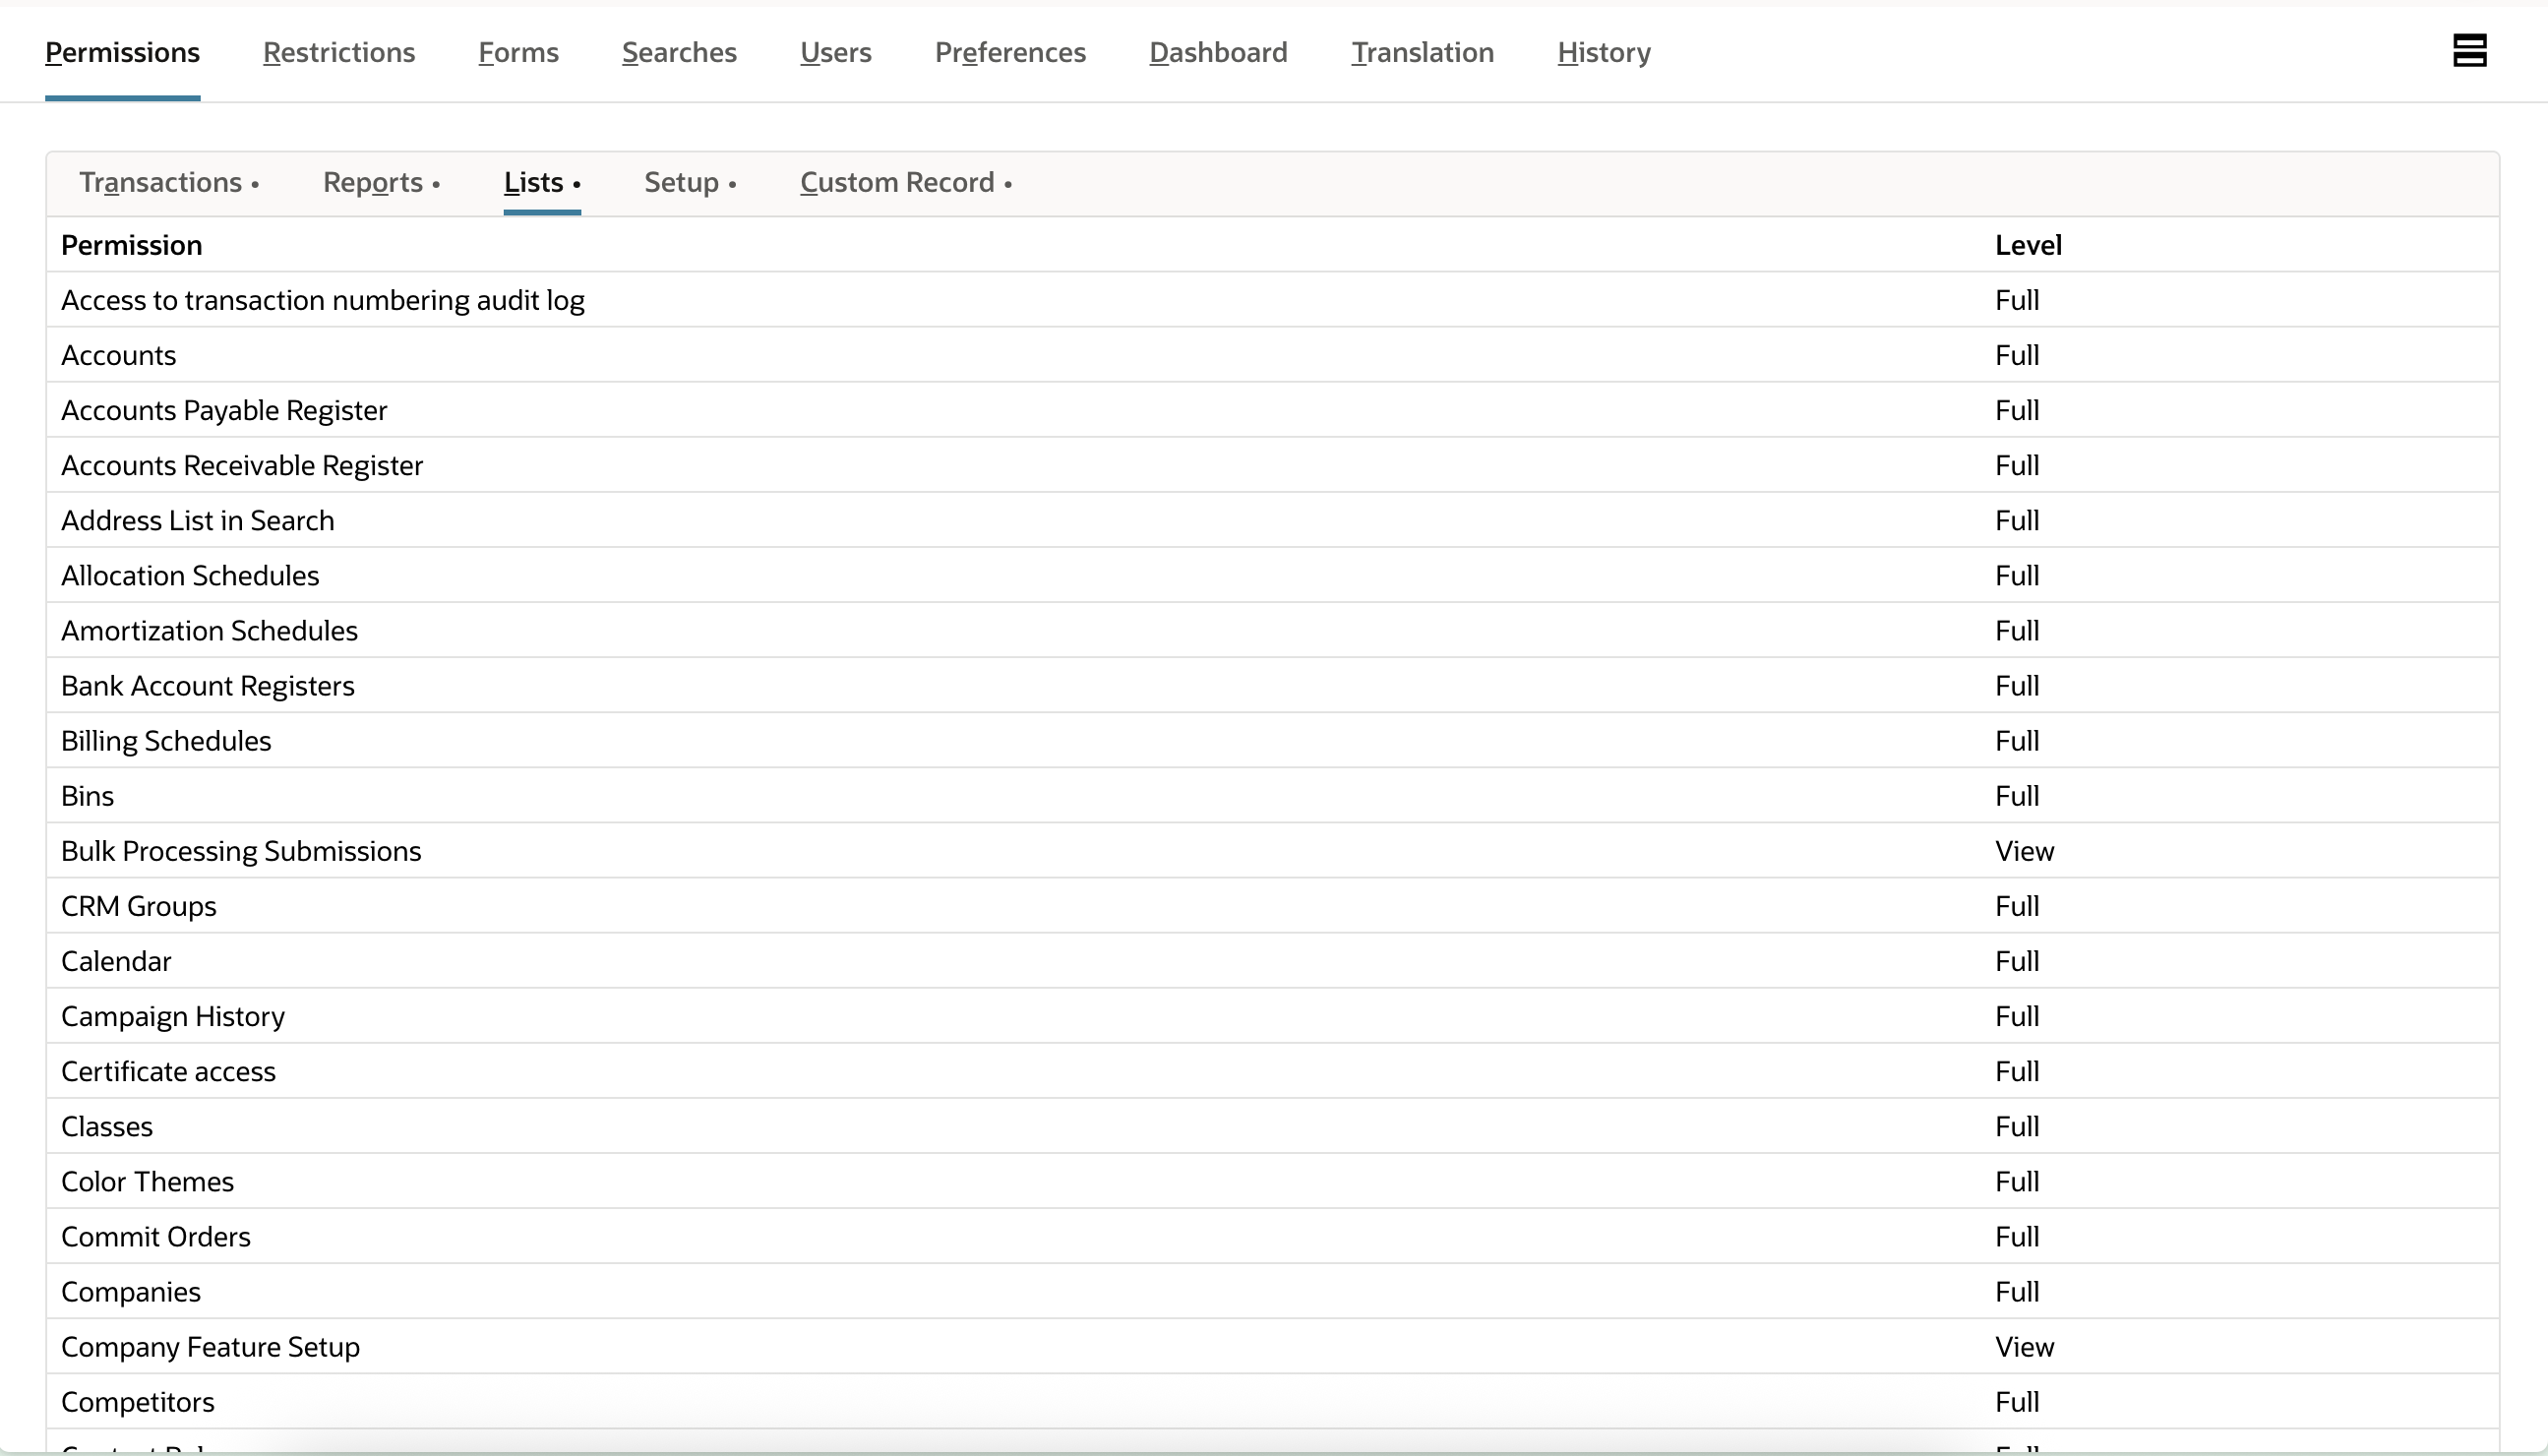
Authorizations > Lists
-
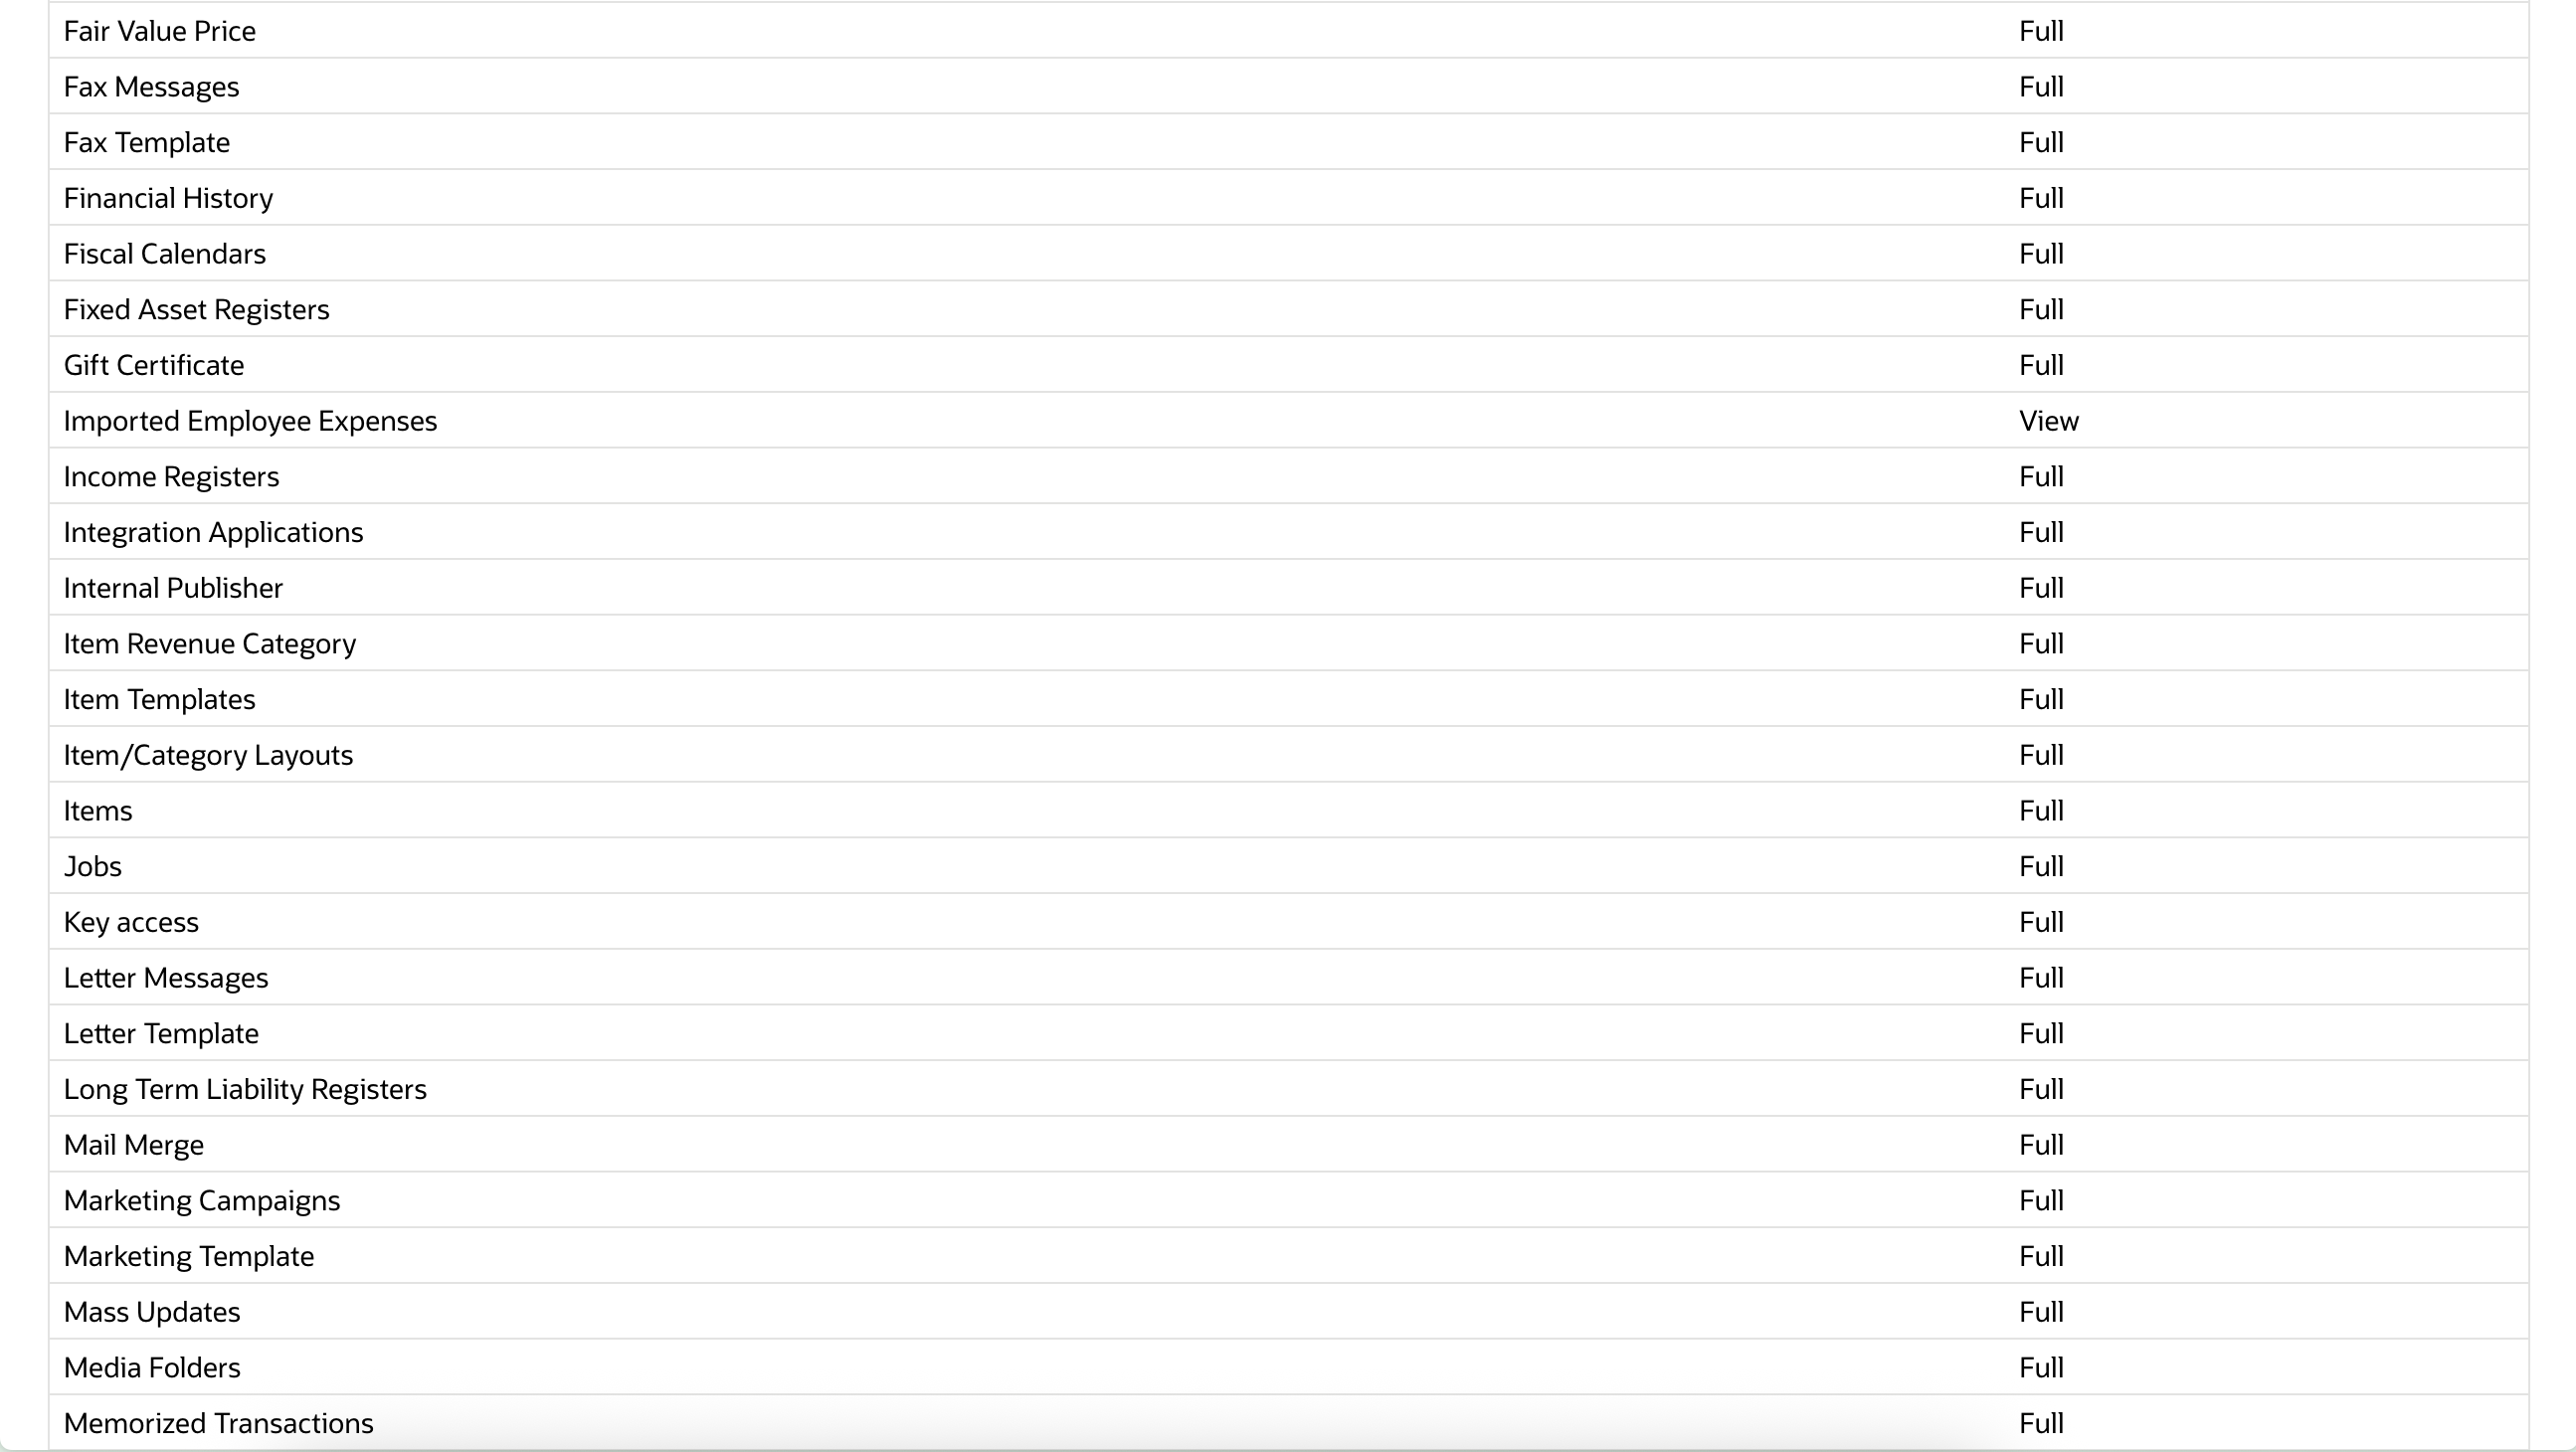
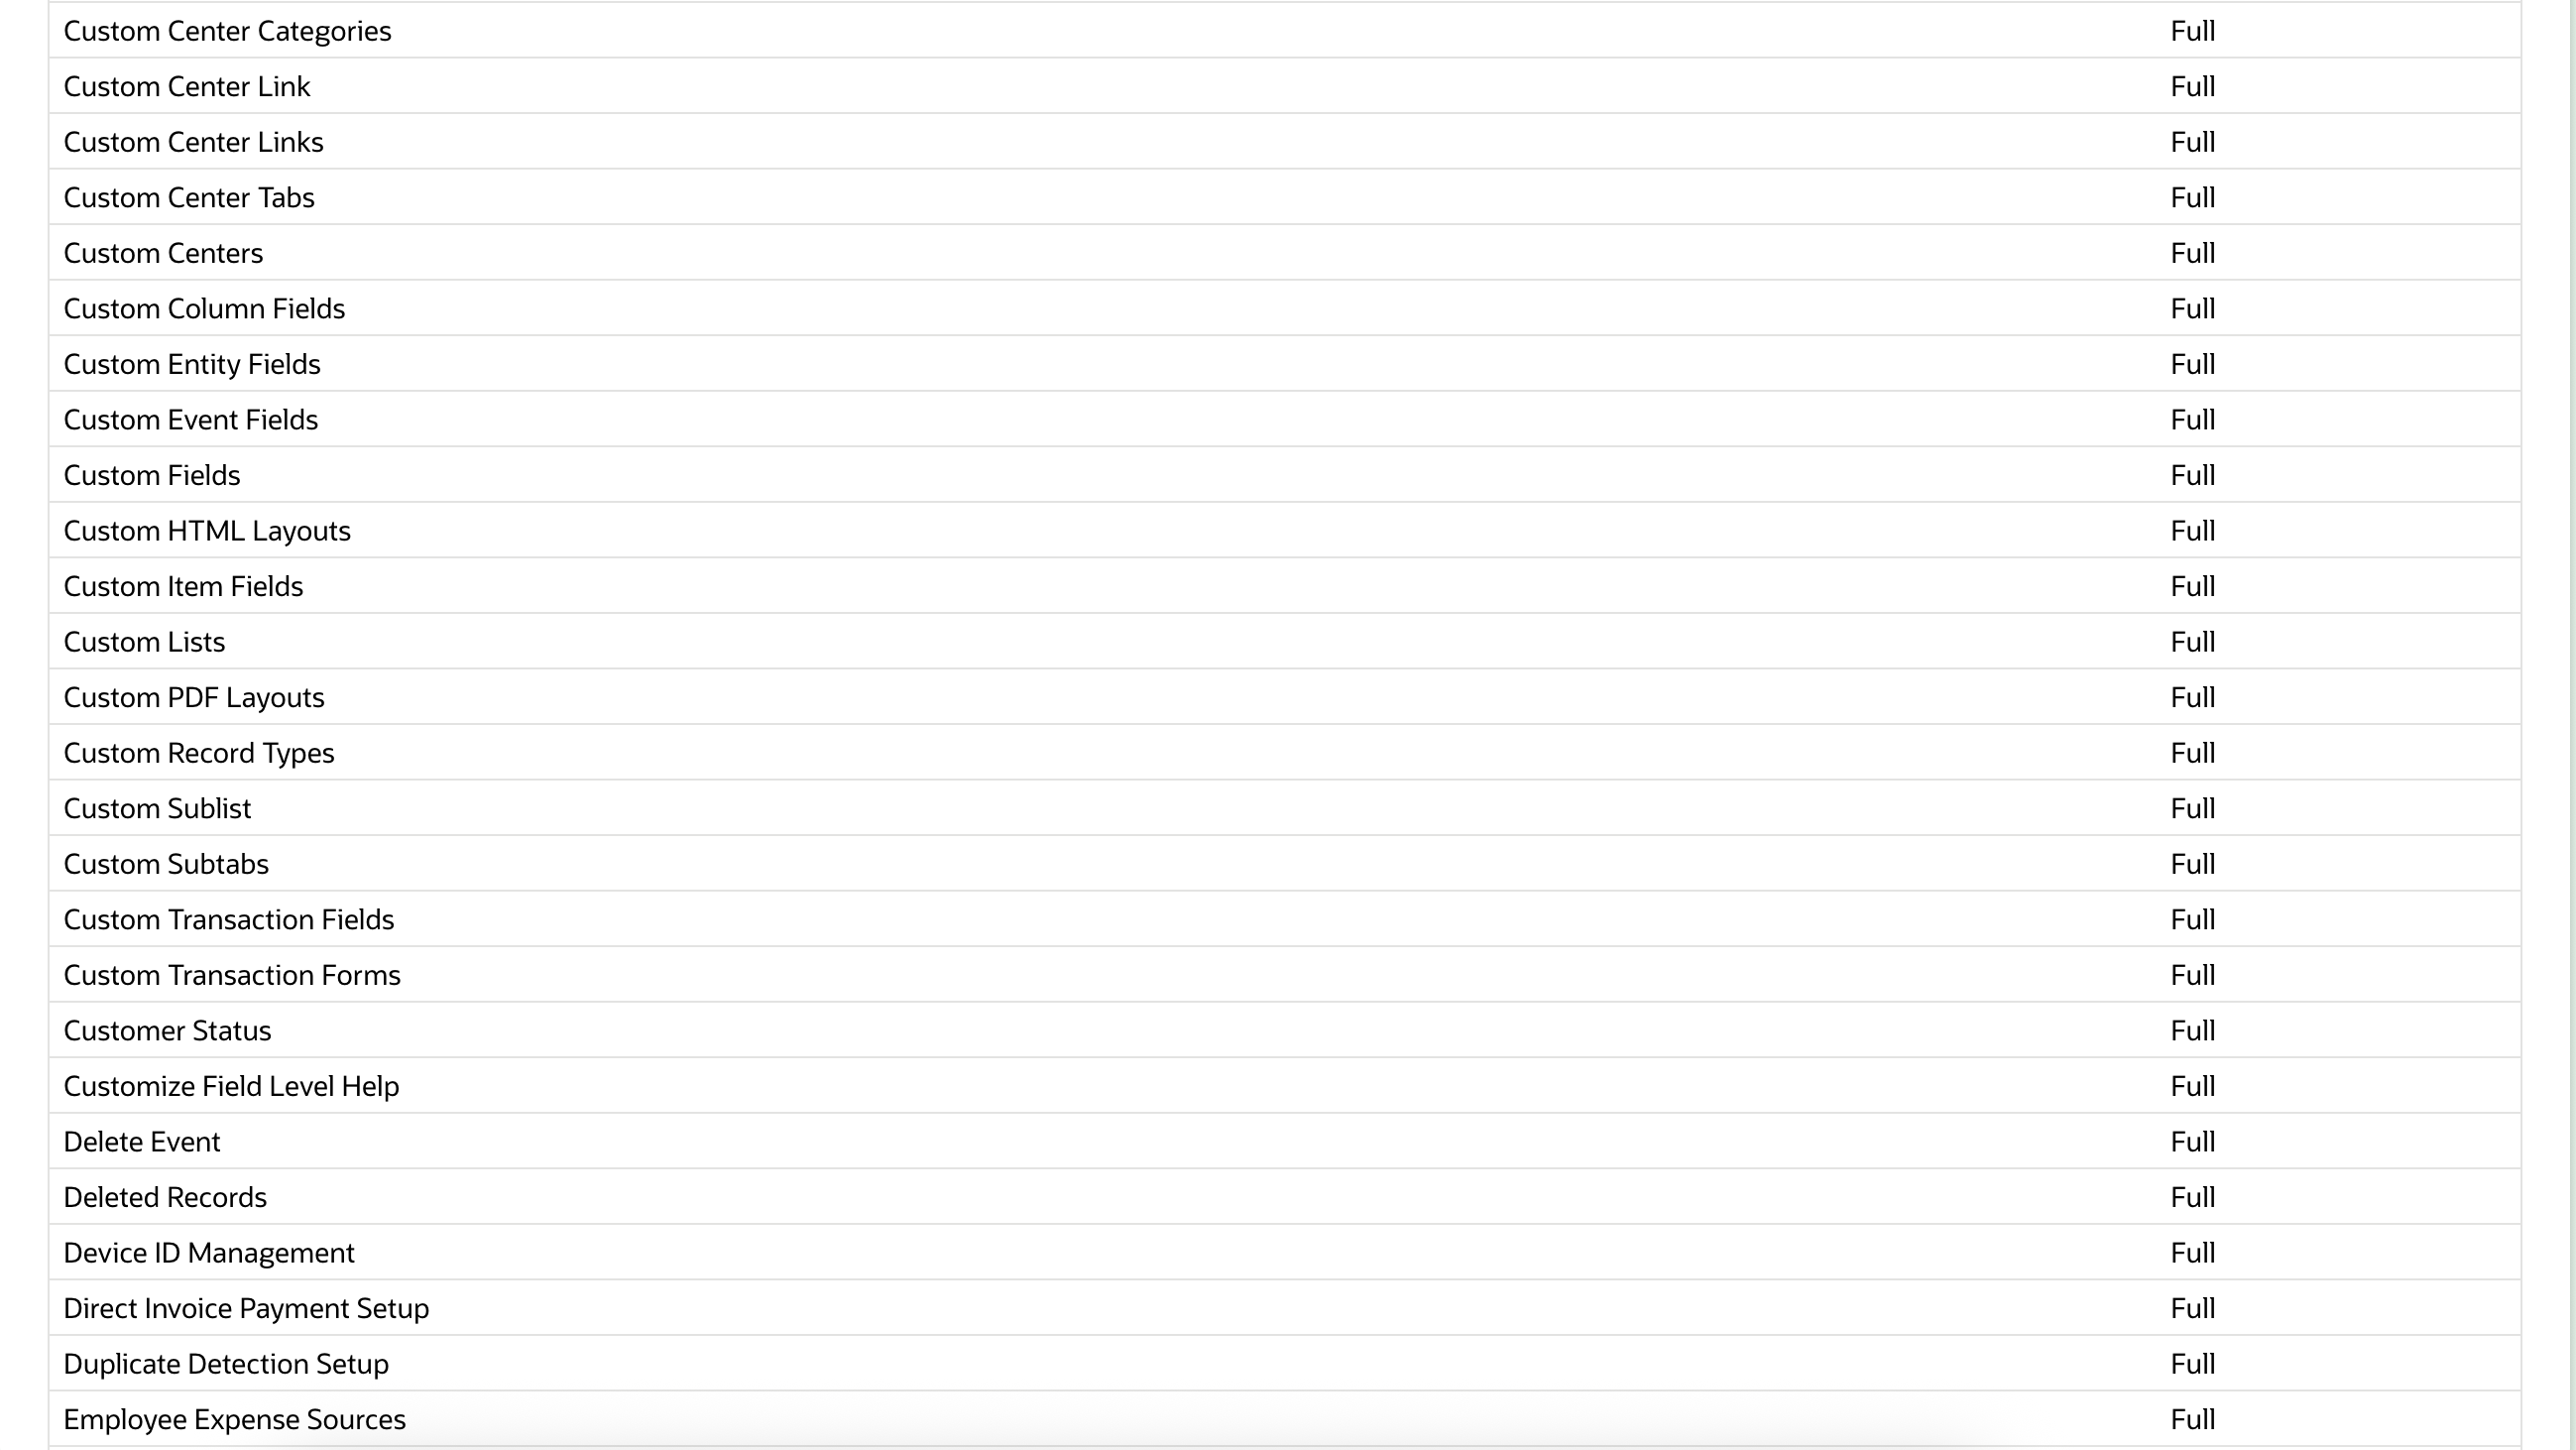
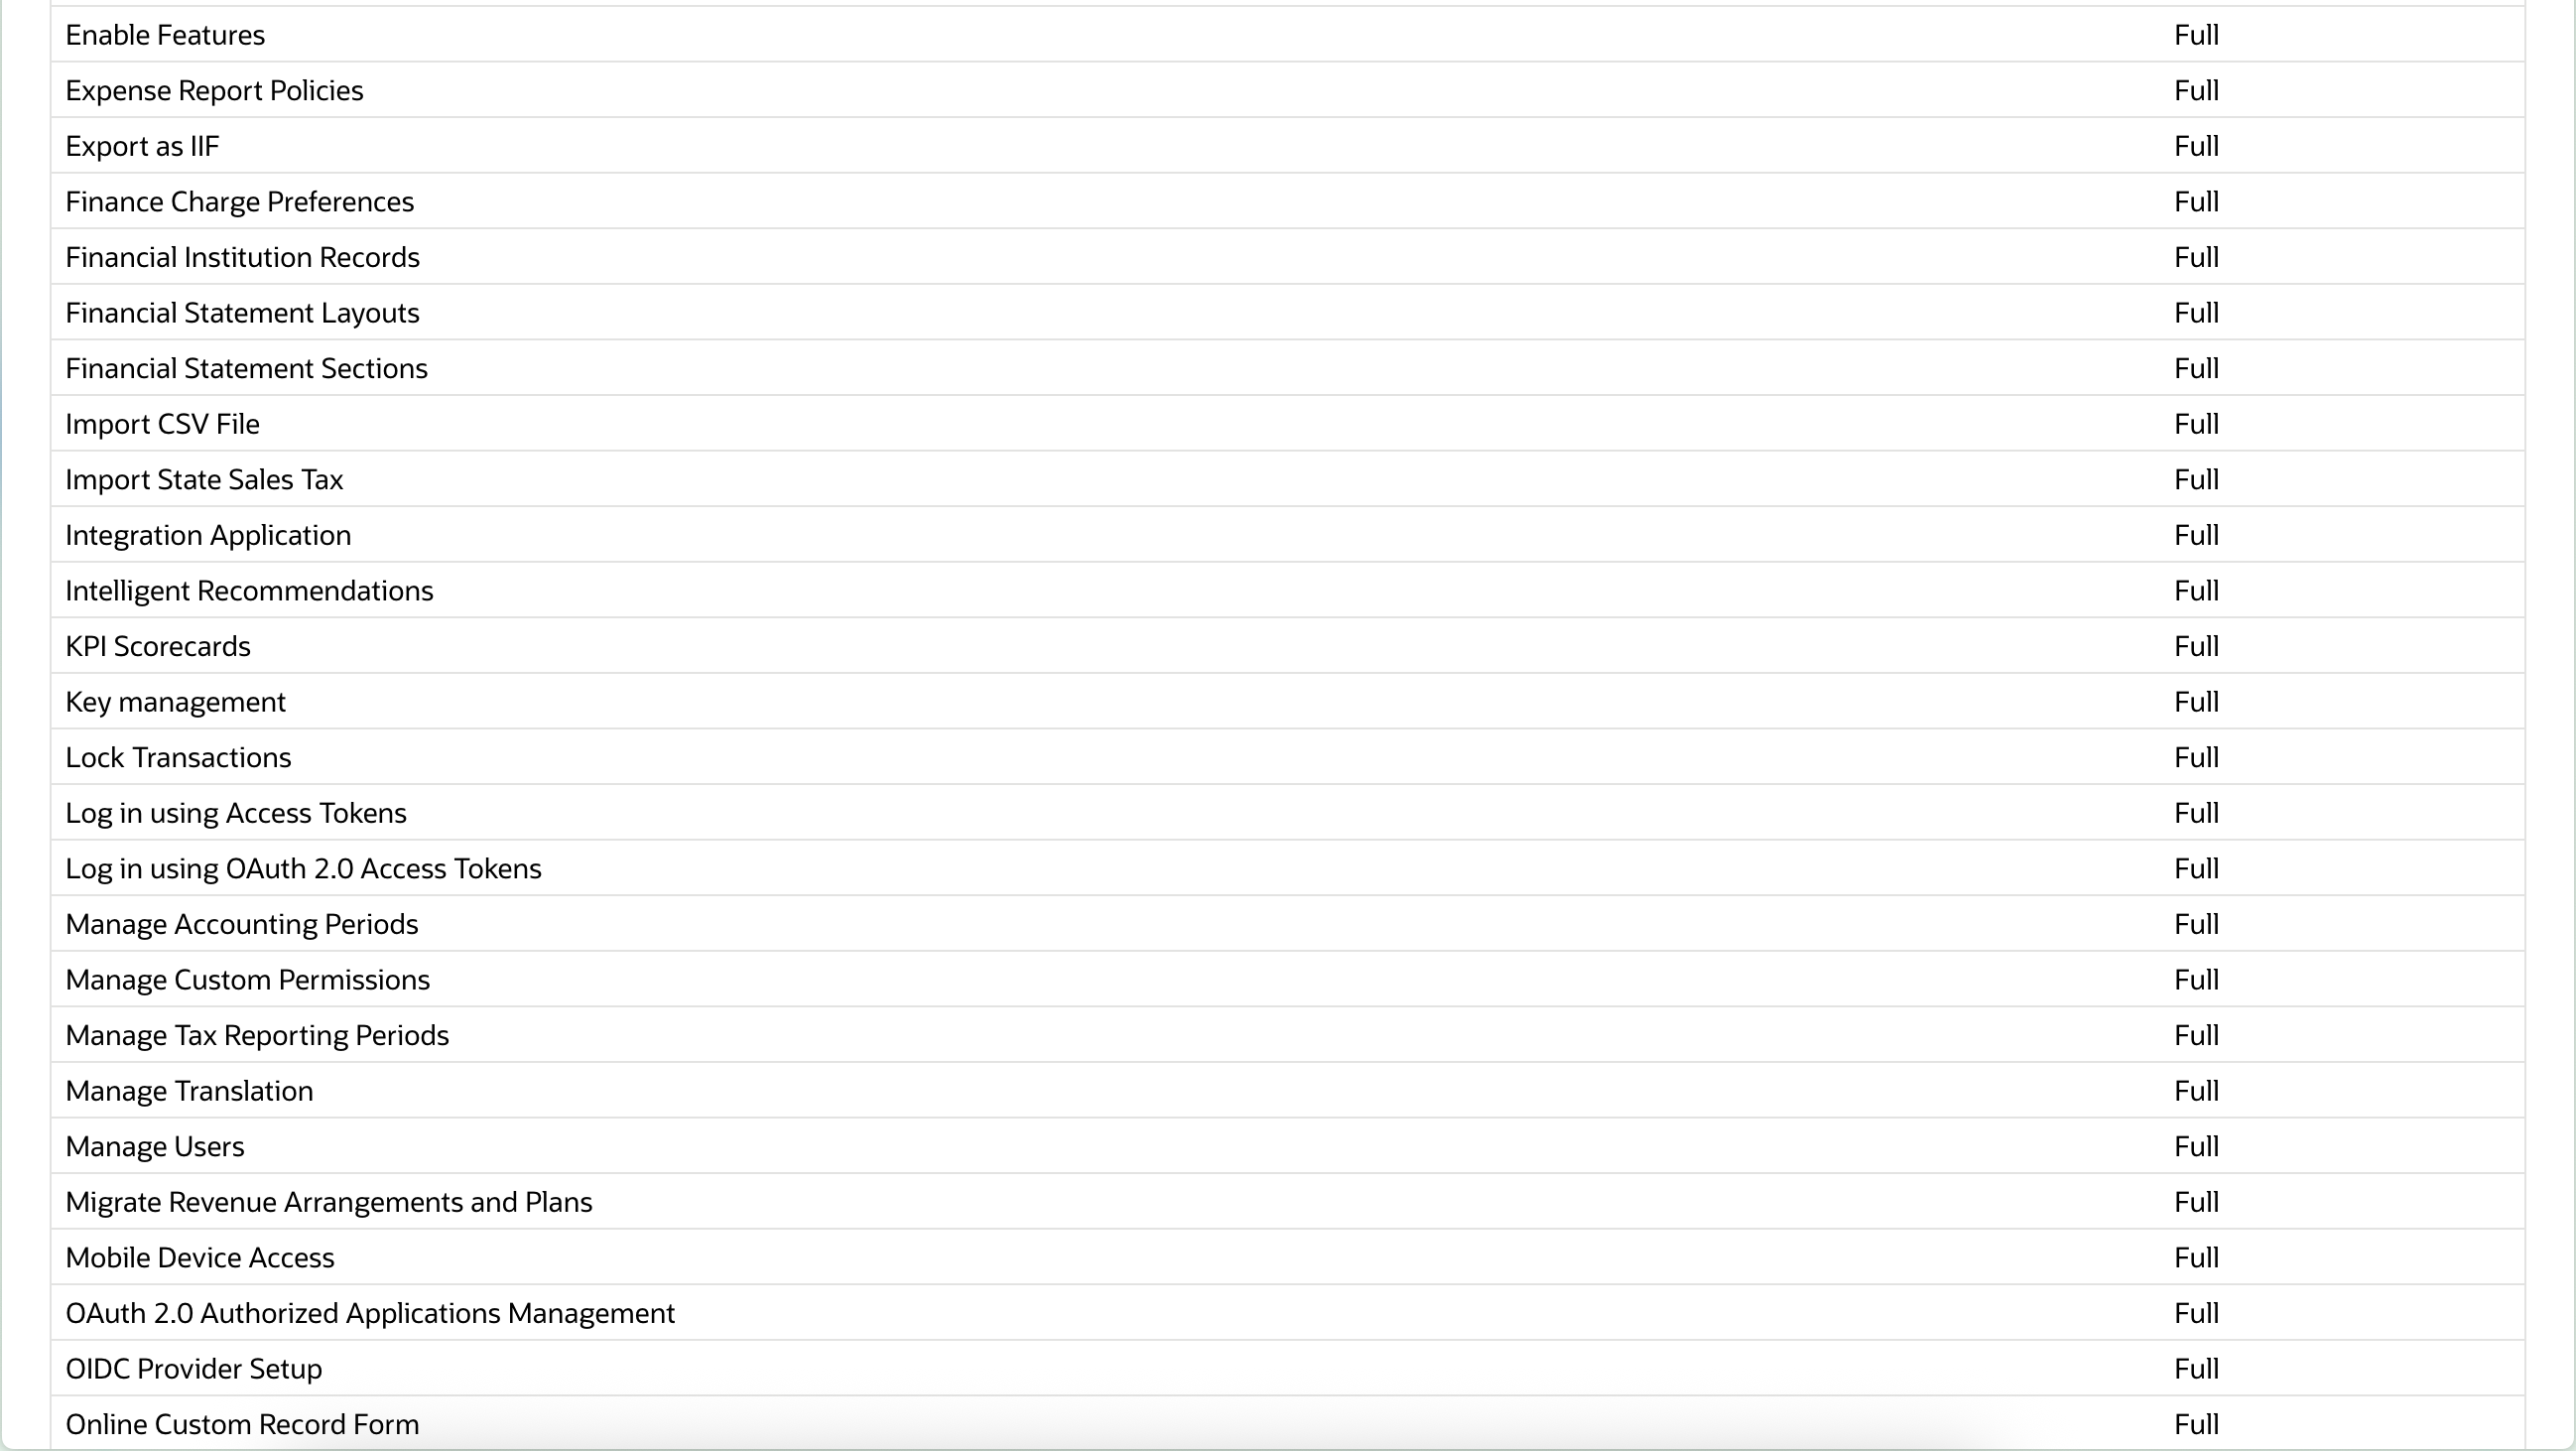
Authorizations > Configuration
-
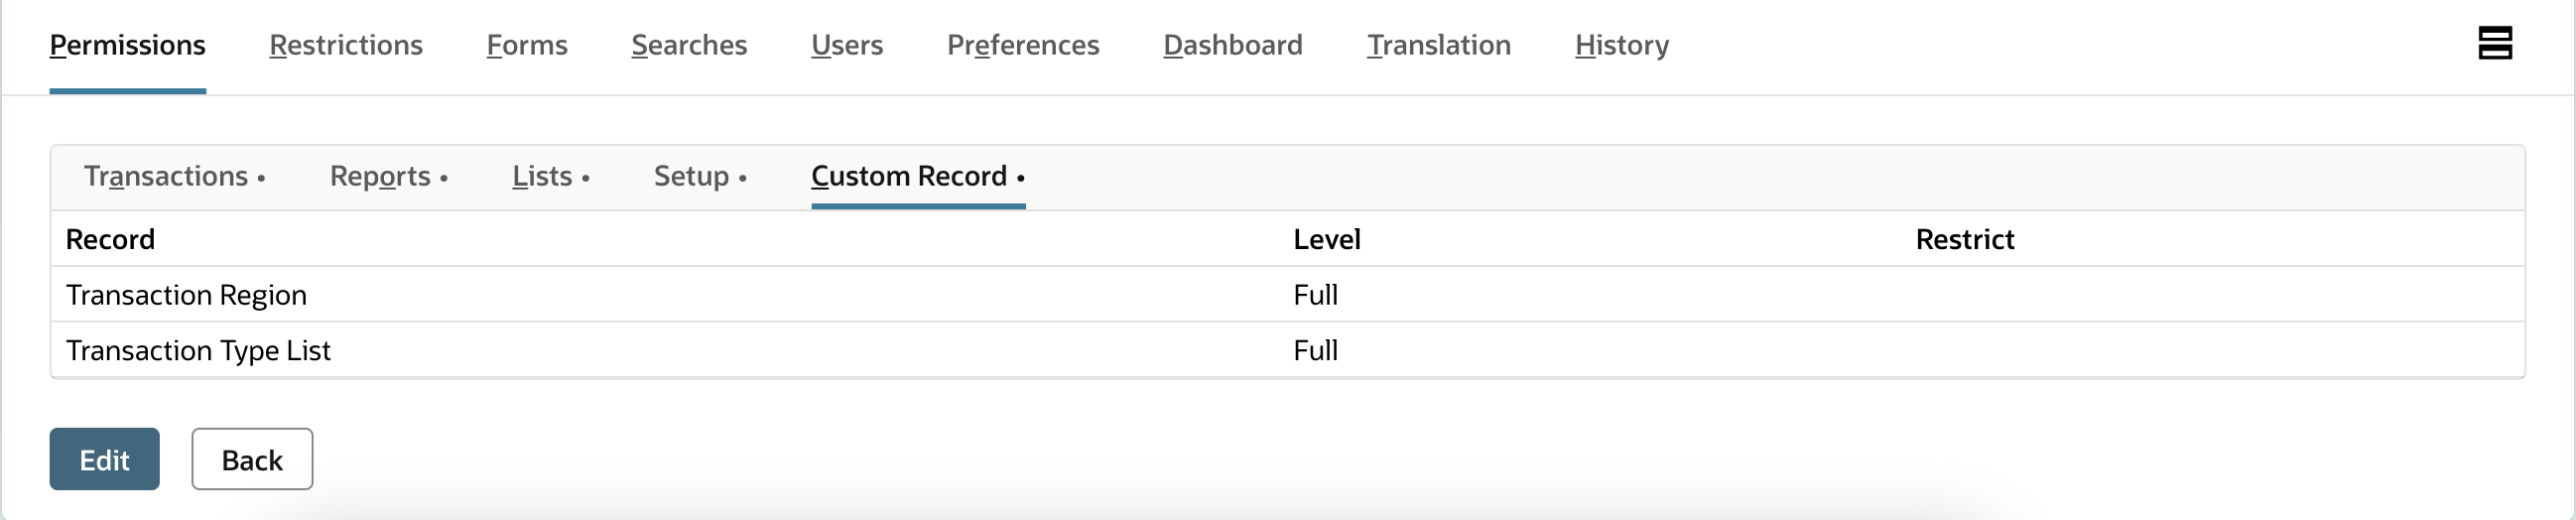
Authorizations > Custom recording
The role must be associated with your user so that it can be used (https://docs.oracle.com/en/cloud/saas/netsuite/ns-online-help/section N897798.html)
Managing integration
Under Configuration > Integration > Integration Management > Managing Integrations > New
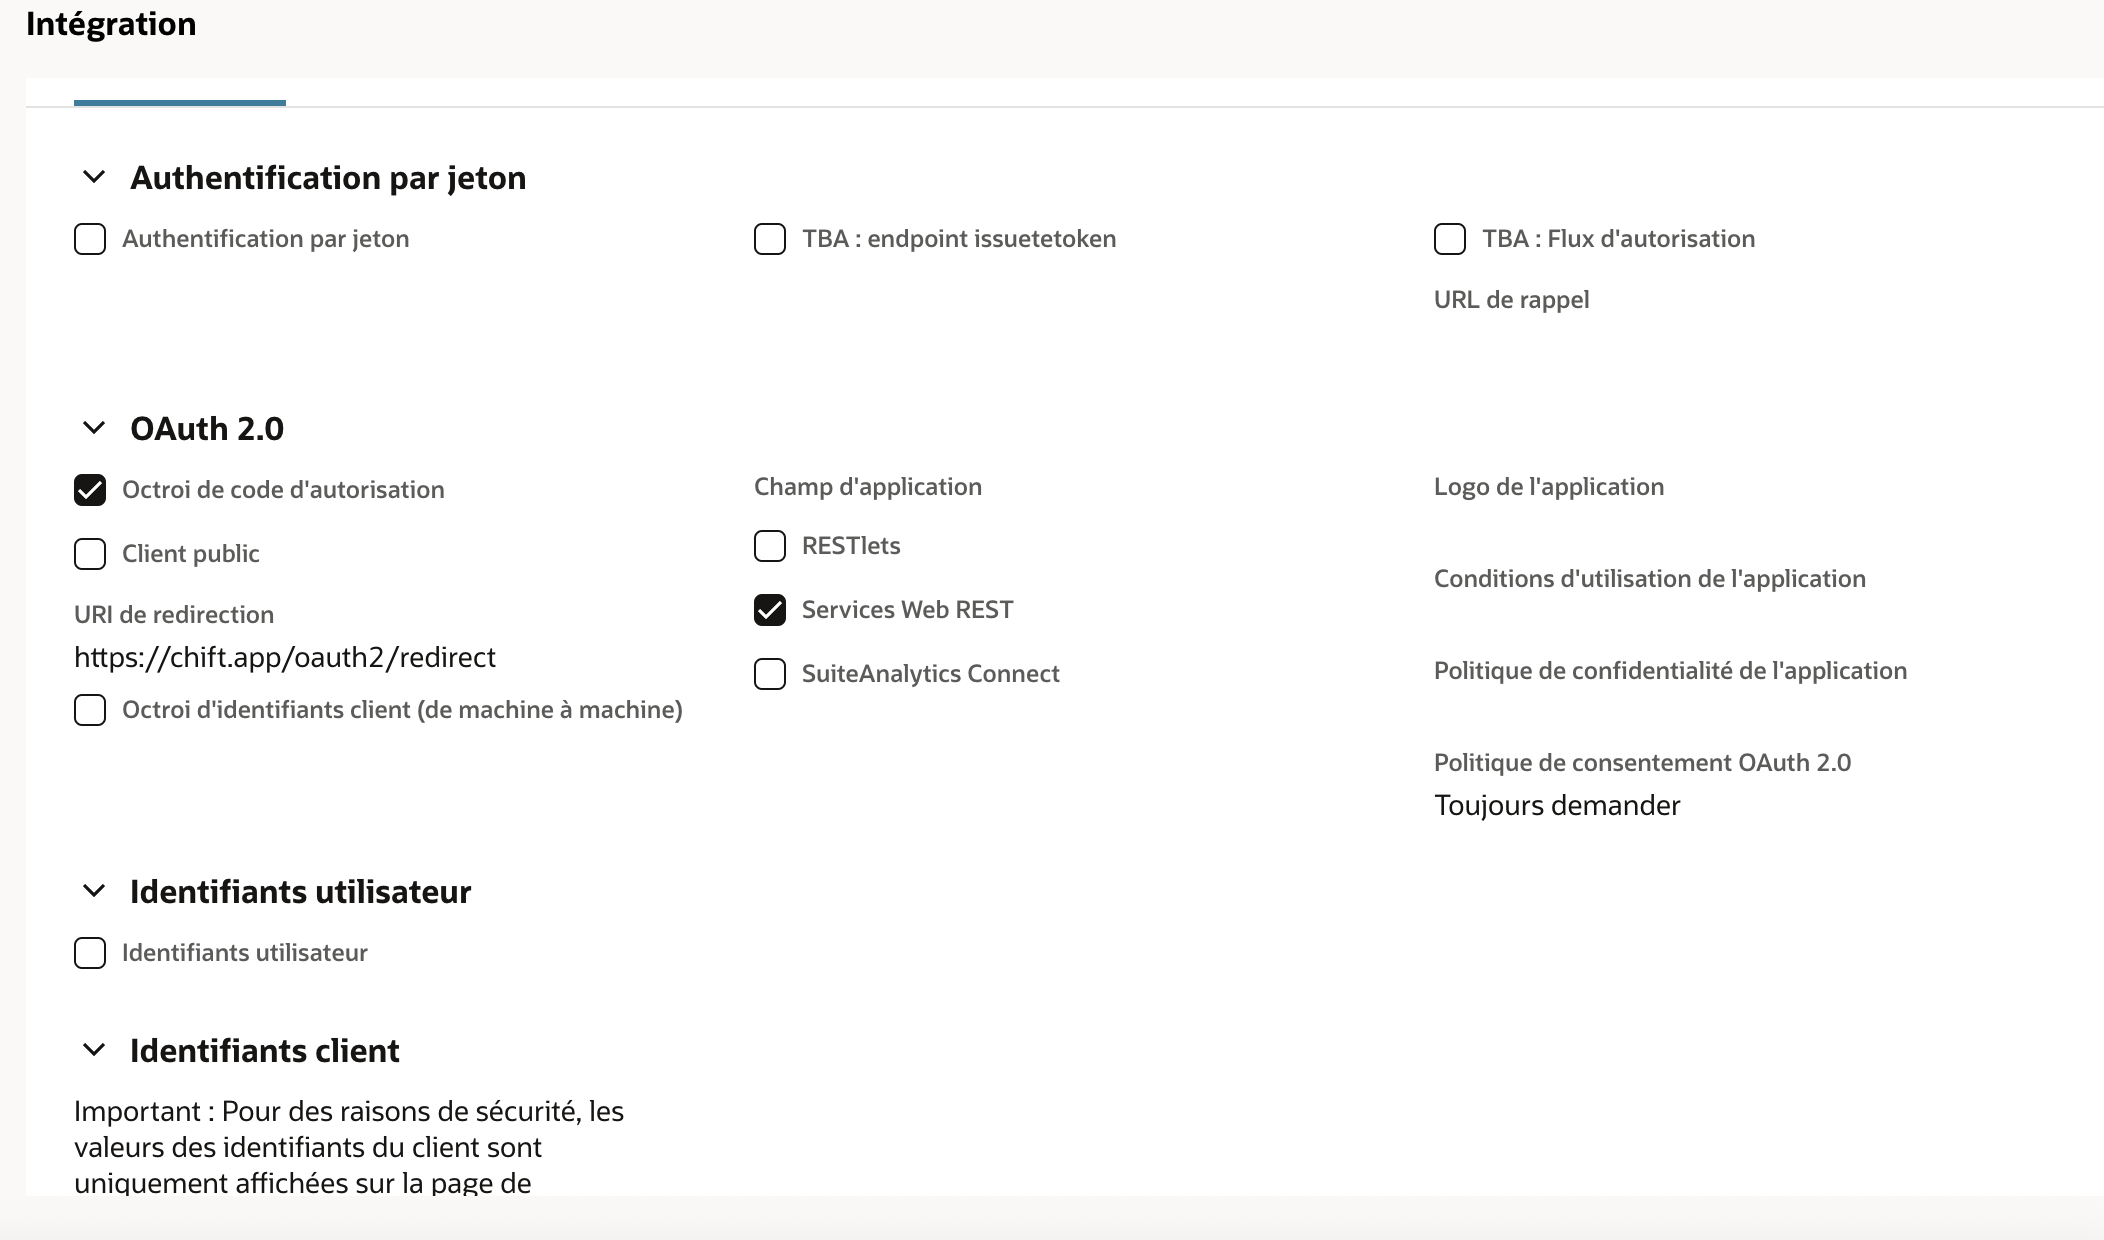
ATTENTION: do not check the "Public customer" box!
The url mentioned in the URI redirection > "https://chift.app/oauth2/redirect"
-
Once created you get a Client id and one Secret Client that you can use to enable integration.

